
首批通过分布式安全可靠测评,为关键业务系统打造


OceanBase MCP Server 与 Trae 集成
更新时间:2026-04-09 14:12:04
编辑
分享
MCP(Model Context Protocol) 是 Anthropic 公司于 2024 年 11 月推出并开源,旨在实现大语言模型与外部工具或数据源交互的协议。通过 MCP,用户不需要将大模型的输出手动复制执行,大模型可以直接指挥工具执行相应的动作(Action)。
OceanBase MCP Server 通过 MCP 协议提供了大模型与 OceanBase 交互的能力,可以执行 SQL 语句。通过合适的客户端可以快速搭建项目原型,已在 github 上开源。
Trae 是一款可集成 MCP Server 的 IDE,可从官网下载最新版本。
本文将展示如何使用 Trae IDE 与 OceanBase MCP Server 集成,快速构建后端应用程序。
前提条件
您已完成部署 OceanBase 数据库并且创建了 MySQL 模式用户租户。创建用户租户的详细信息,参见 创建租户。
安装 Python 3.11 及以上版本 和相应 pip。如果您的机器上 Python 版本较低,可以使用 Miniconda 来创建新的 Python 3.11 及以上的环境,具体可参考 Miniconda 安装指南。
根据所用的操作系统,安装 Git。
安装 Python 包管理器 uv。安装完成后,可使用
uv --version命令验证安装是否成功:pip install uv uv --version下载 Trae IDE,根据自己的操作系统选择合适的版本进行安装。
步骤一:获取数据库连接信息
联系 OceanBase 数据库部署人员或者管理员获取相应的数据库连接串,例如:
obclient -h$host -P$port -u$user_name -p$password -D$database_name
参数说明:
$host:提供 OceanBase 数据库连接 IP。OceanBase 数据库代理(OceanBase Database Proxy,ODP)连接方式使用的是一个 ODP 地址;直连方式使用的是 OBServer 节点的 IP 地址。$port:提供 OceanBase 数据库连接端口。ODP 连接的方式默认是2883,在部署 ODP 时可自定义;直连方式默认是2881,在部署 OceanBase 数据库时可自定义。$database_name:需要访问的数据库名称。注意
连接租户的用户需要拥有该数据库的
CREATE、INSERT、DROP和SELECT权限。更多有关用户权限的信息,请参见 MySQL 模式下的权限分类。$user_name:提供租户的连接账户。ODP 连接的常用格式:用户名@租户名#集群名或者集群名:租户名:用户名;直连方式格式:用户名@租户名。$password:提供账户密码。
更多连接串的信息,请参见 通过 OBClient 连接 OceanBase 租户。
步骤二:配置 OceanBase MCP Server
克隆 OceanBase MCP Server 仓库
执行下面的命令将源代码下载到本地:
git clone https://github.com/oceanbase/mcp-oceanbase.git
进入源代码目录:
cd mcp-oceanbase
安装依赖
在 mcp-oceanbase 目录下执行下面的命令创建虚拟环境,并安装依赖:
uv venv
source .venv/bin/activate
uv pip install .
创建 Trae 客户端的工作目录
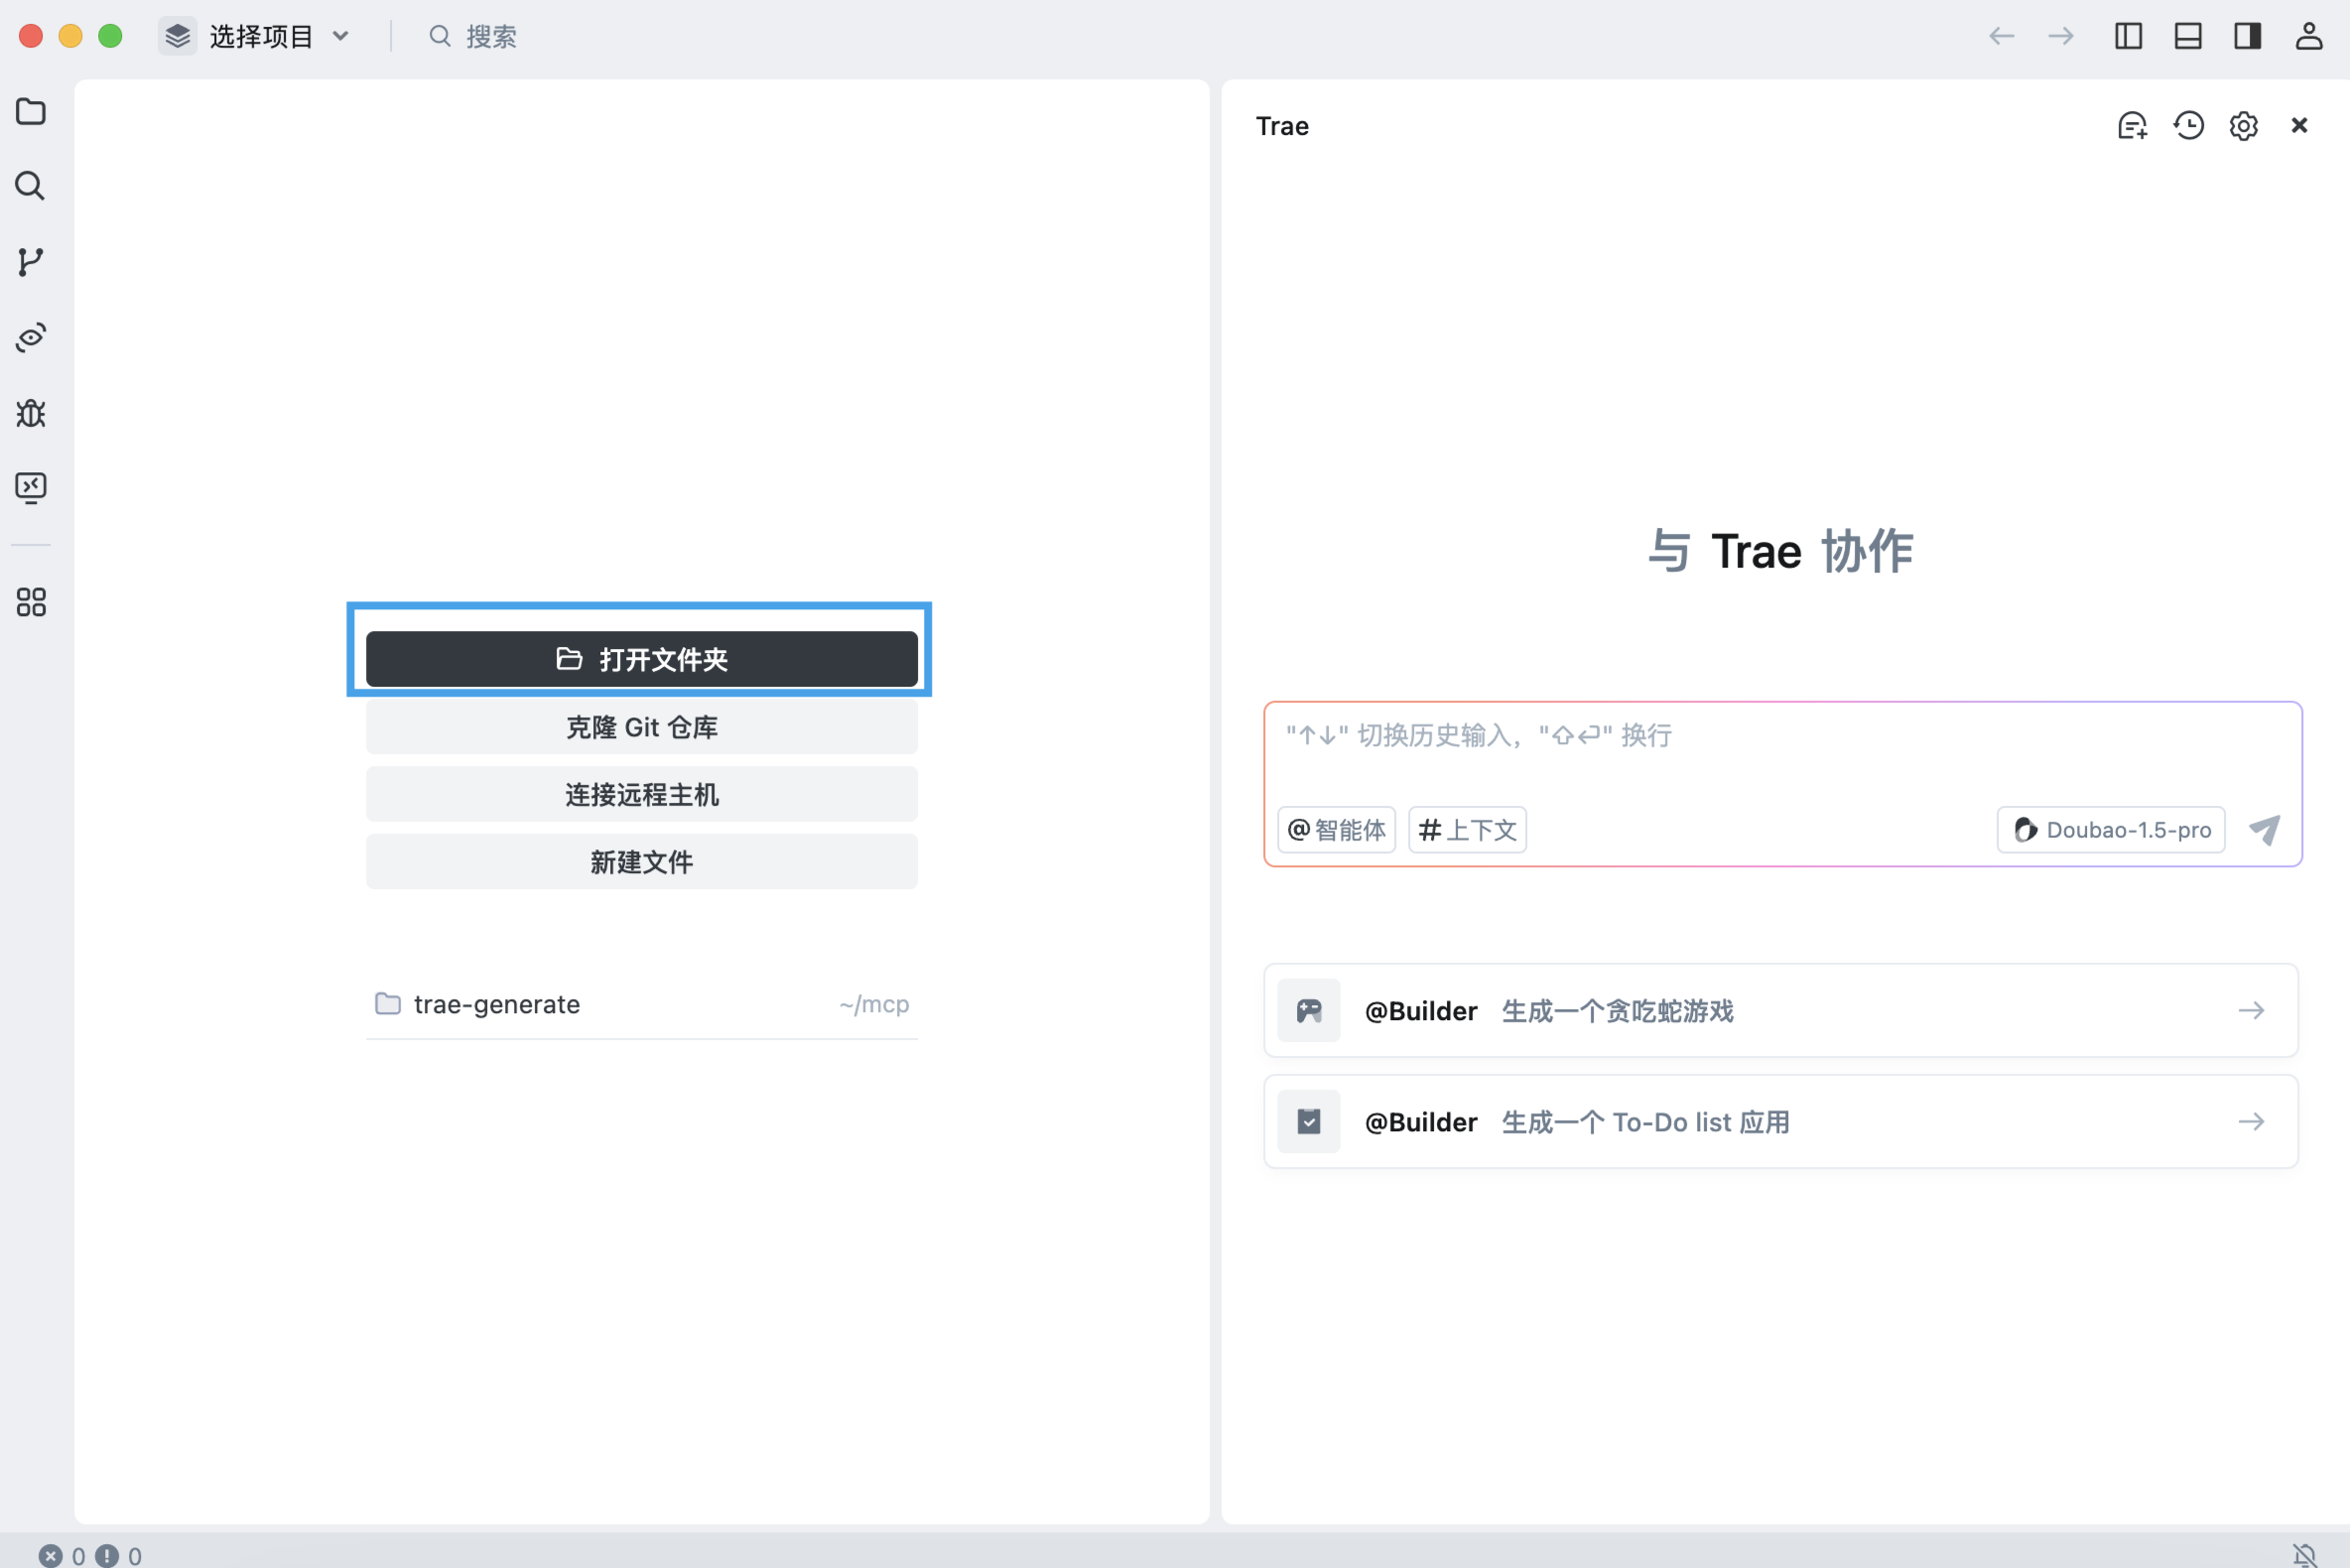
手动创建一个 Trae 的工作目录,并用 Trae 打开,后面 Trae 生成的文件将放在这个目录下,示例的目录名为 trae-generate。
在 Trae 客户端中配置 OceanBase MCP Server
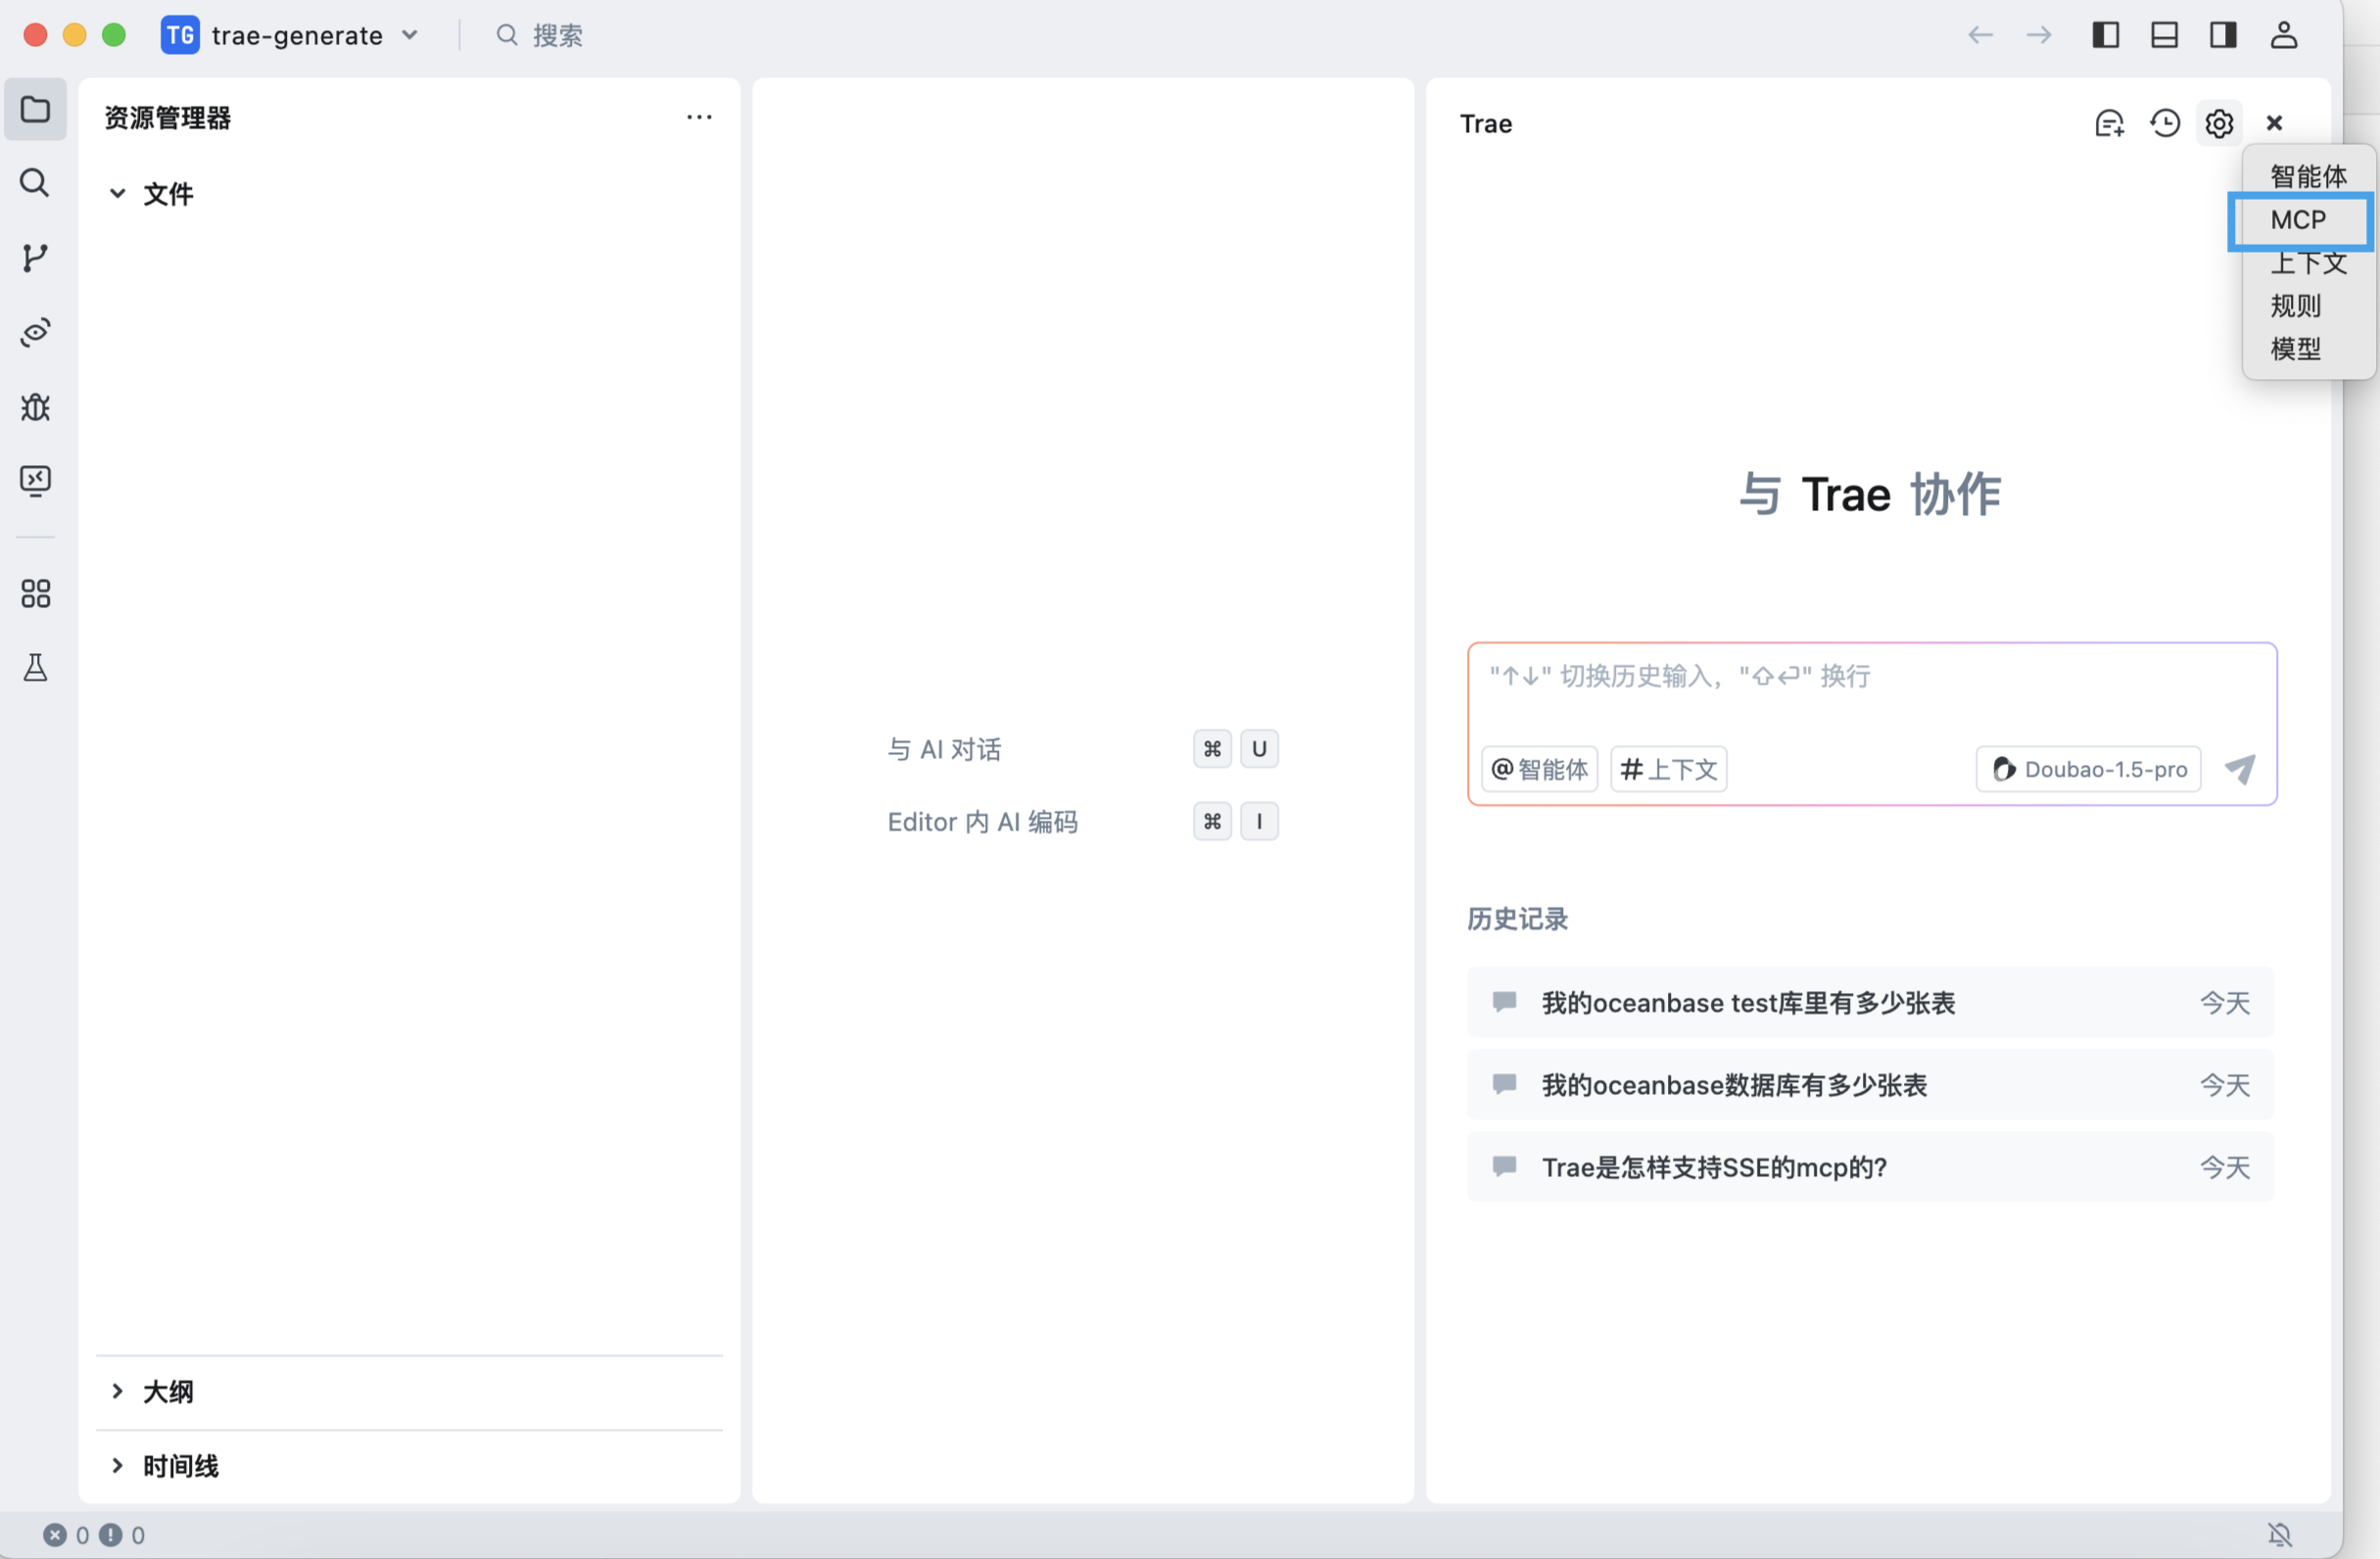
使用快捷键 Ctrl + U(Windows)或者 Command + U(MacOS)打开聊天对话框,点击右上角的齿轮,选择 MCP。
添加并配置 MCP Servers
点击
添加 MCP Servers,选择手动配置。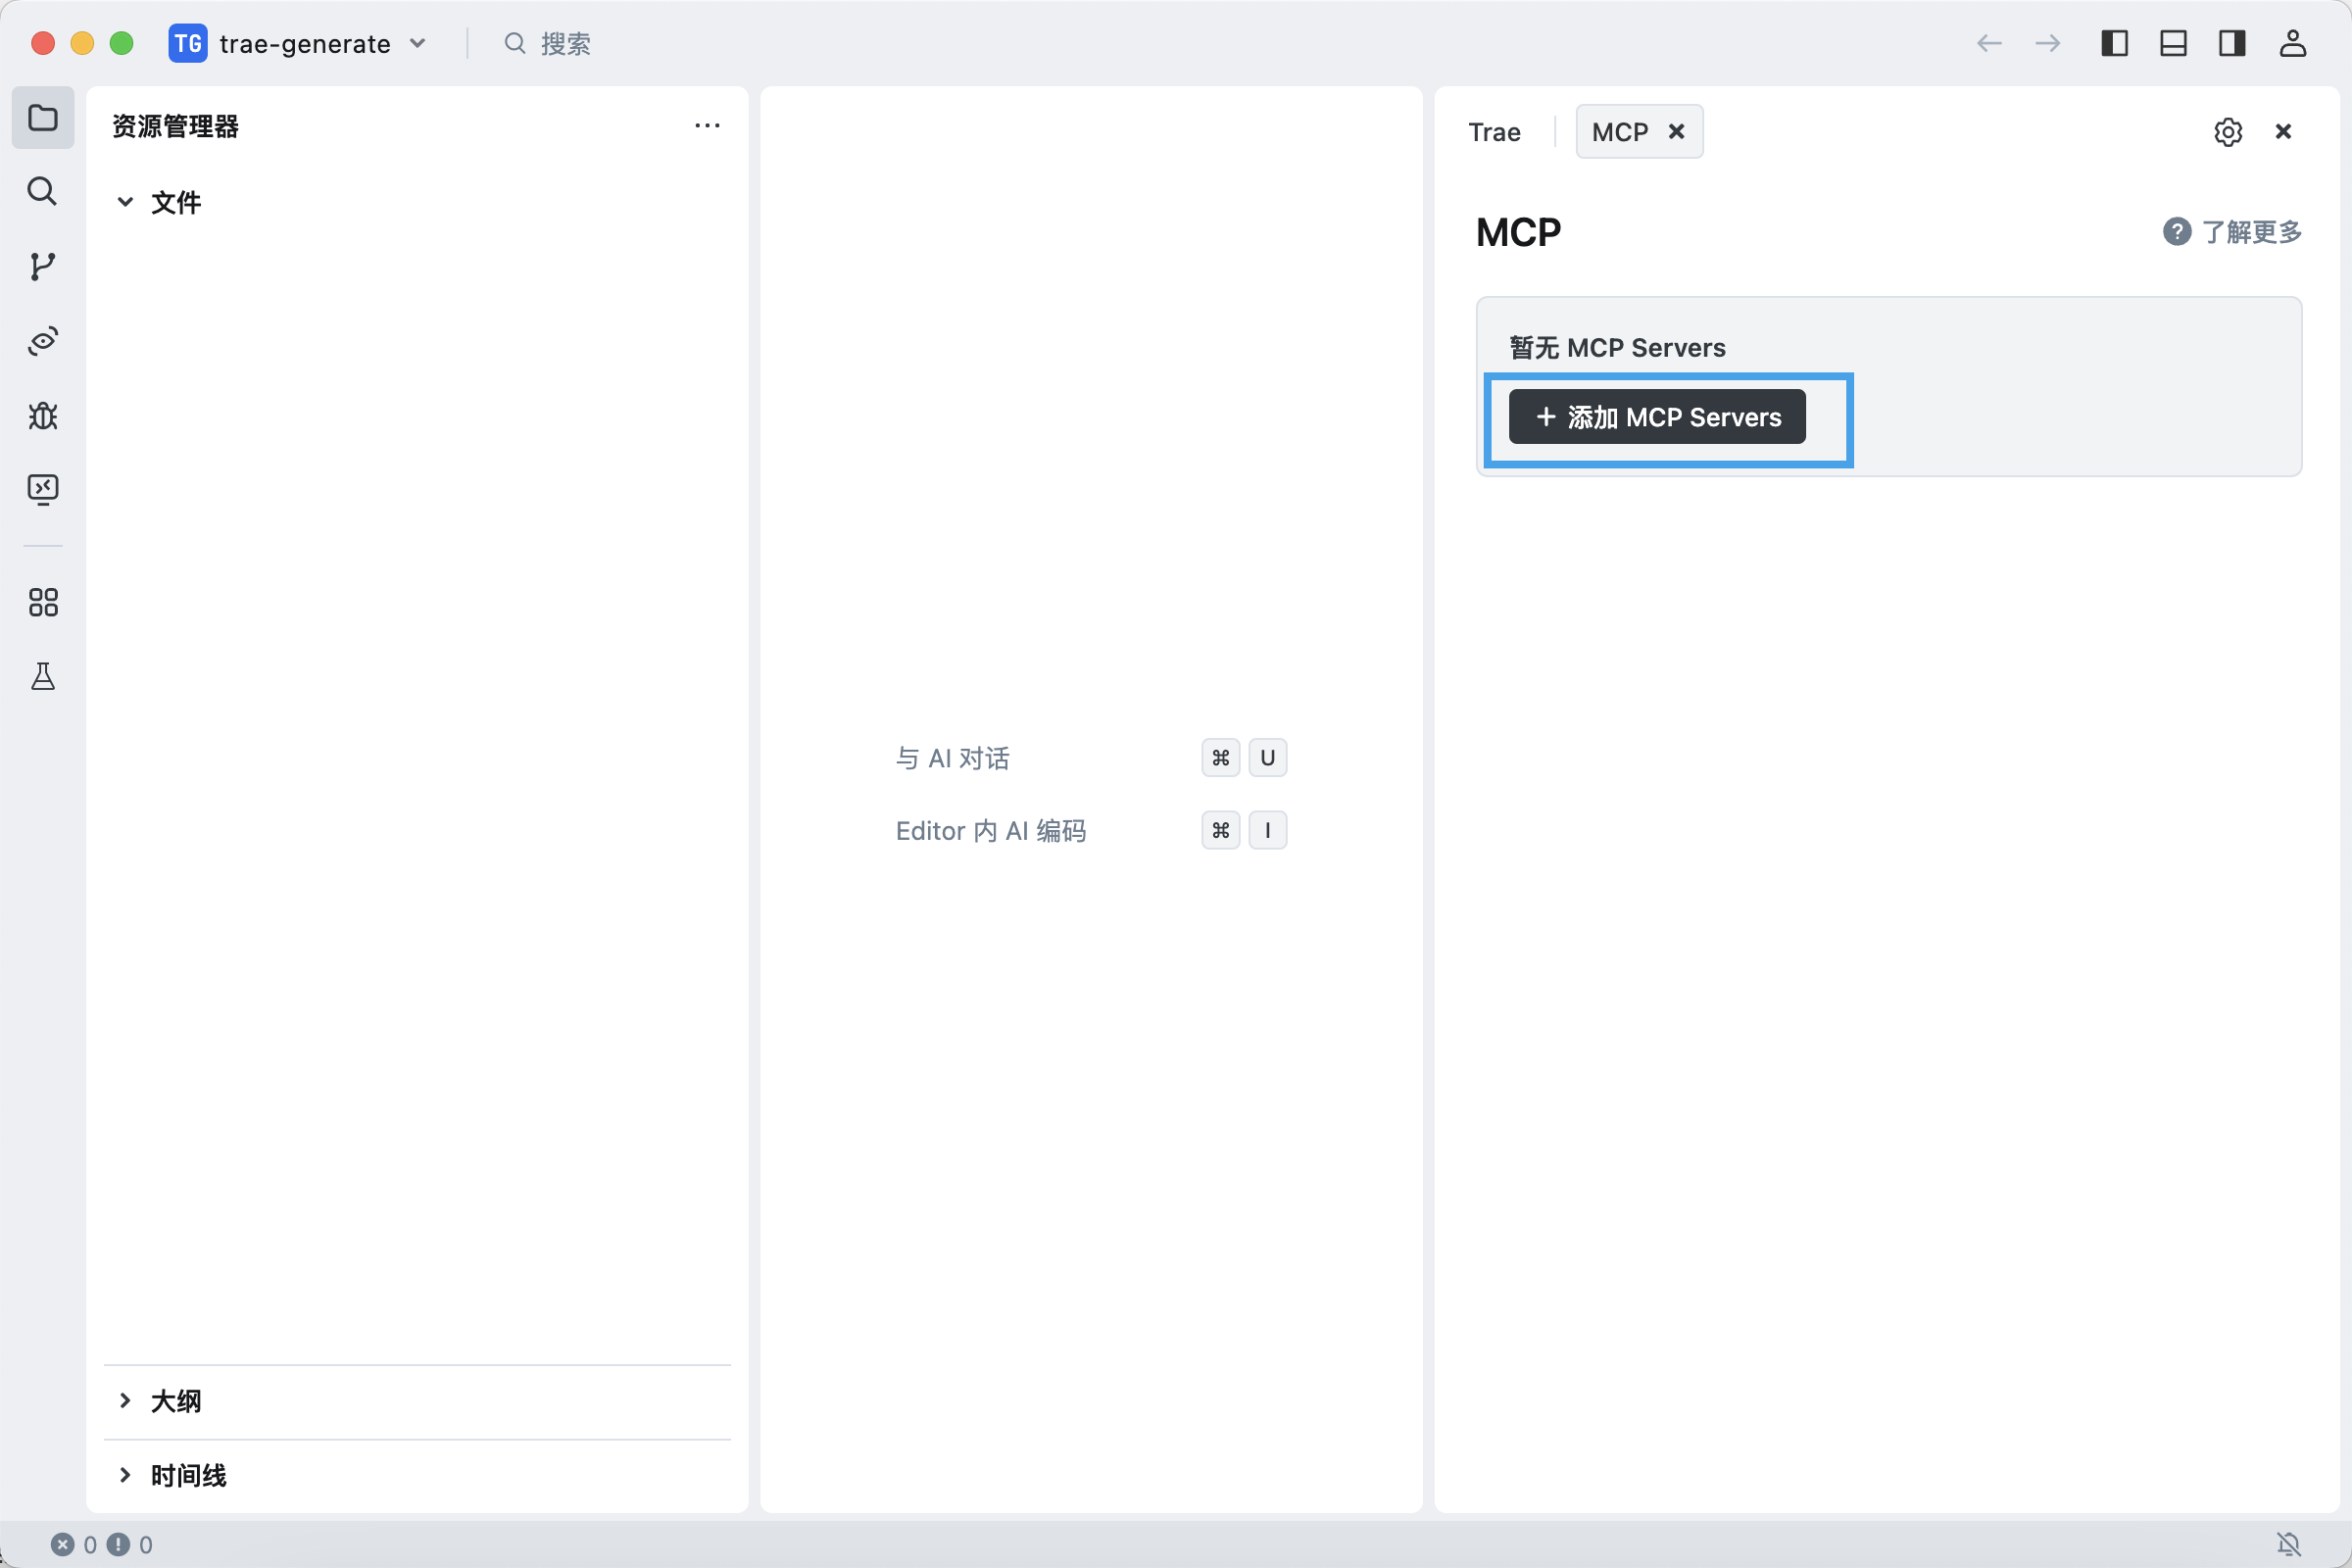
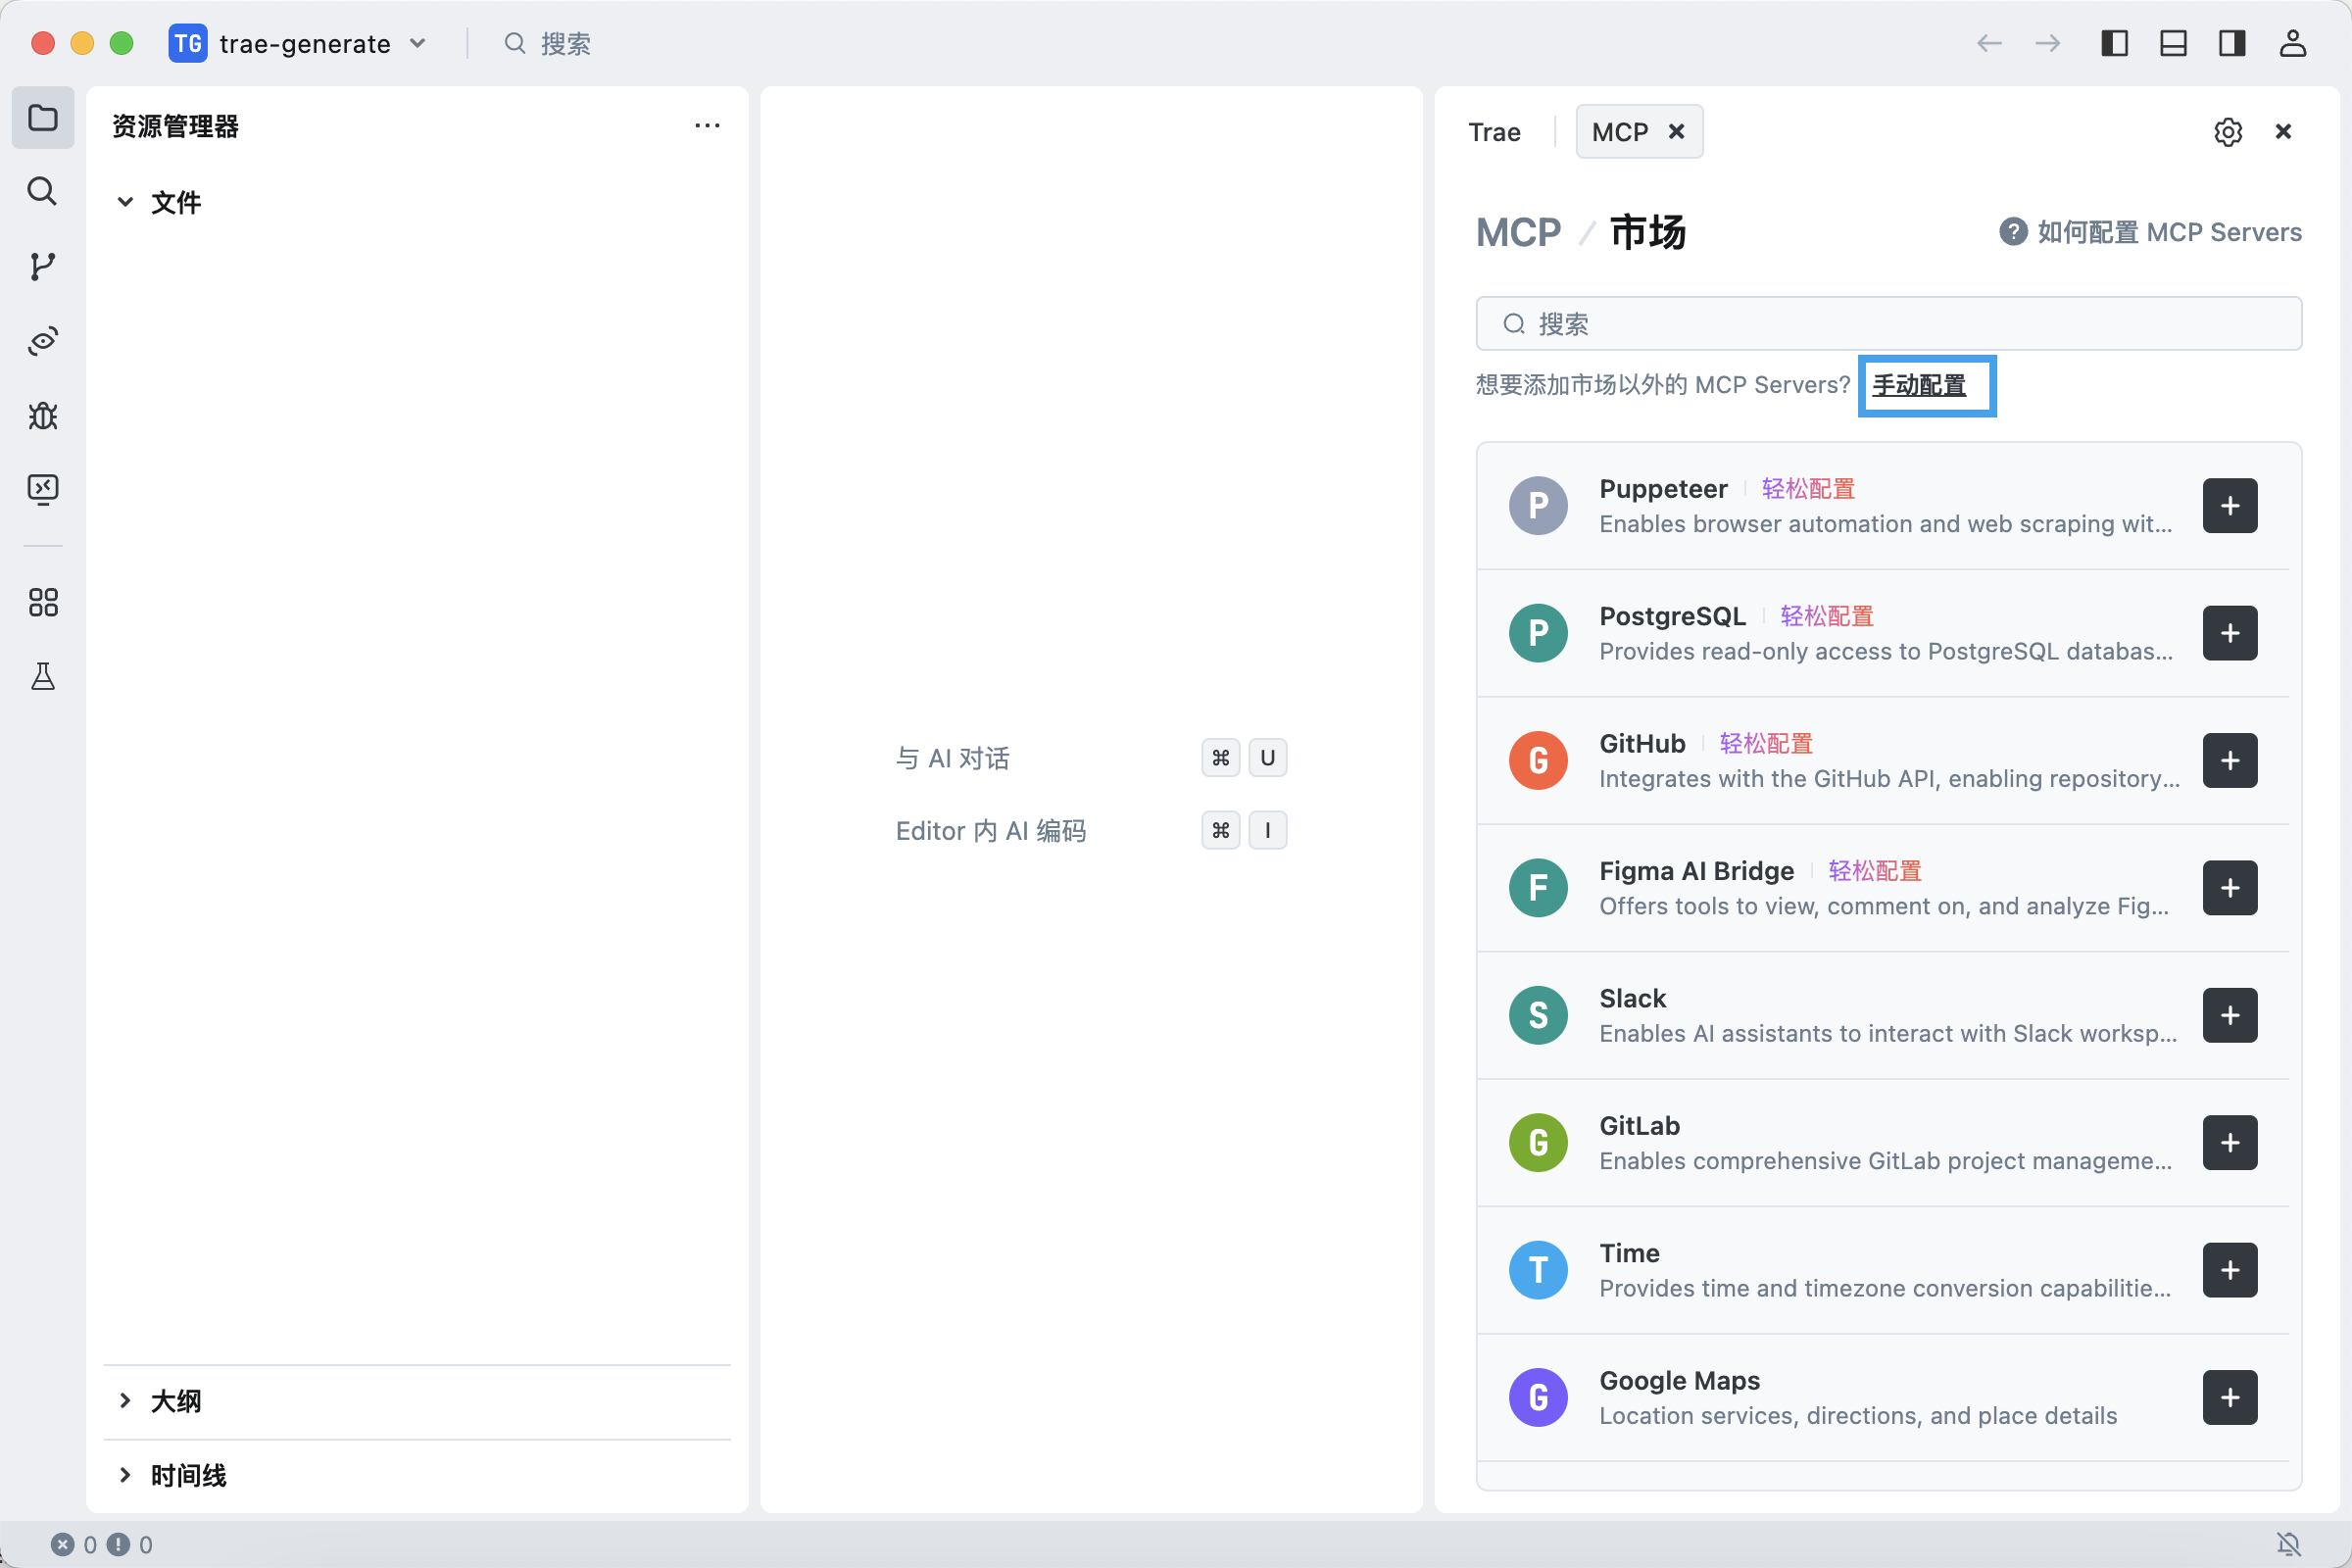
填写配置文件,将编辑框中的示例内容删除。
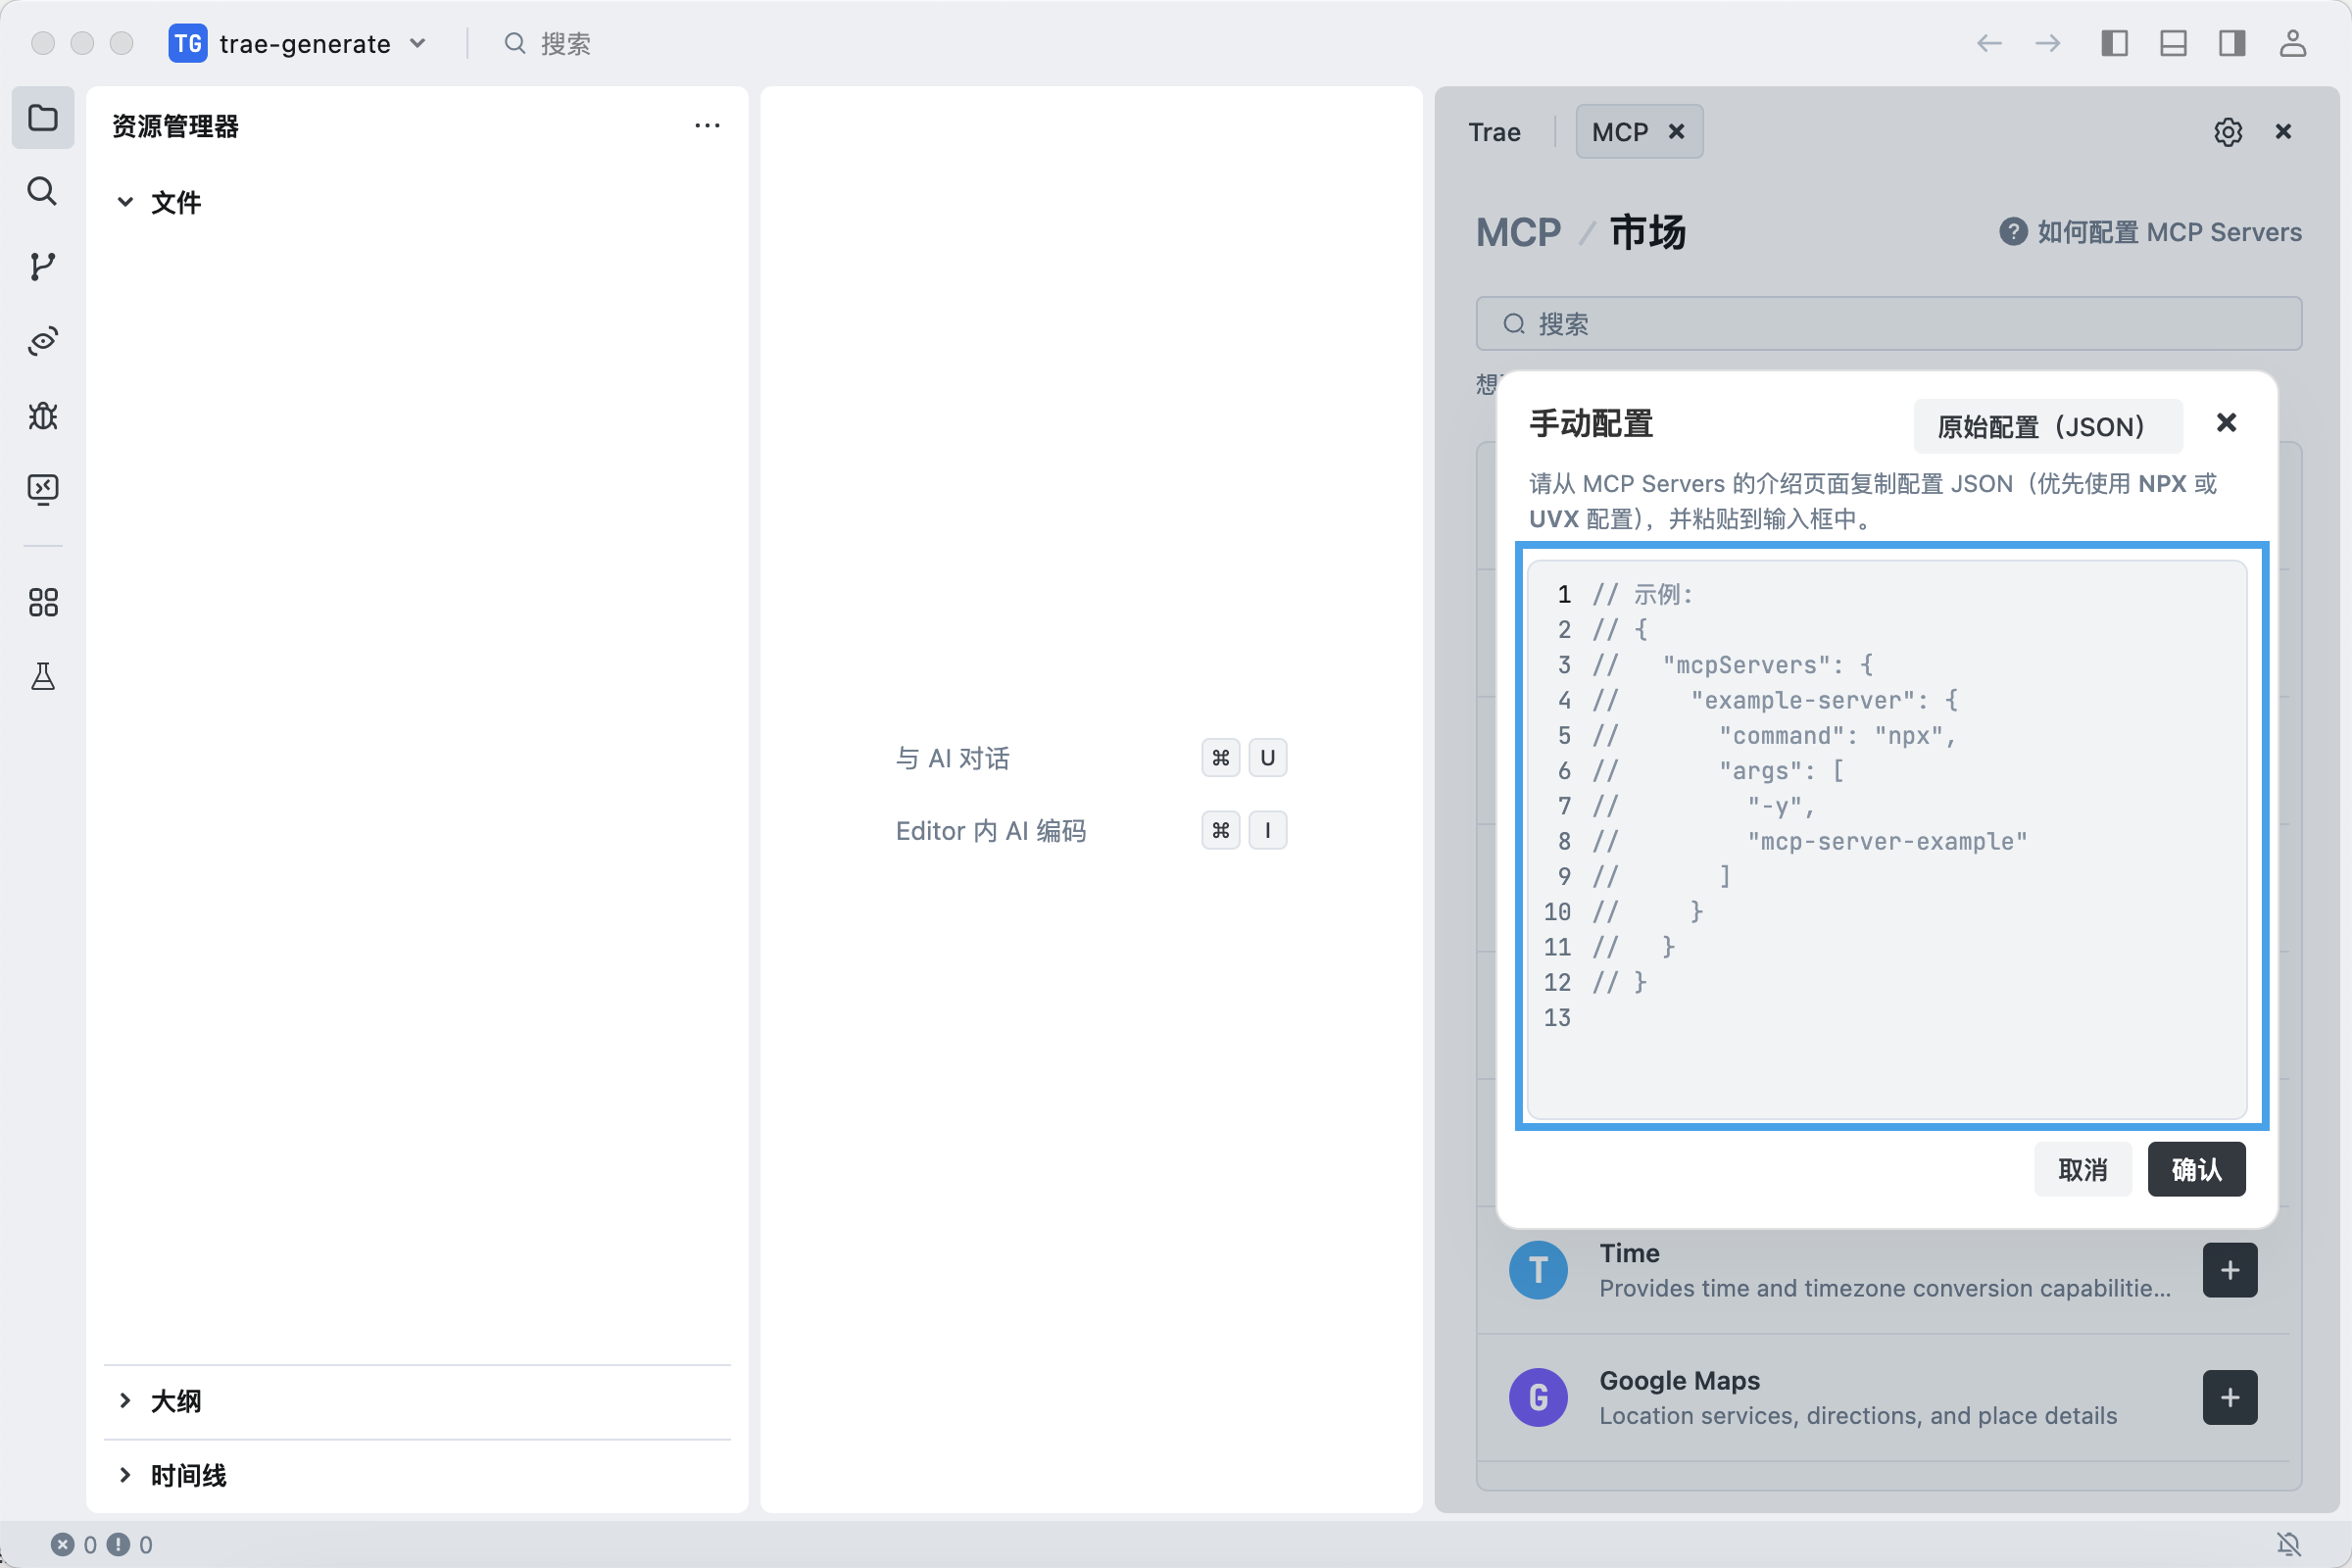
然后填入以下内容:
{ "mcpServers": { "oceanbase": { "command": "uv", "args": [ "--directory", // 需要替换为 oceanbase_mcp_server 文件夹的绝对路径 "/path/to/your/mcp-oceanbase/src/oceanbase_mcp_server", "run", "oceanbase_mcp_server" ], "env": { // 需替换为您的 OceanBase 数据库连接信息 "OB_HOST": "***", "OB_PORT": "***", "OB_USER": "***", "OB_PASSWORD": "***", "OB_DATABASE": "***" } } } }如配置成功,将显示
可使用状态。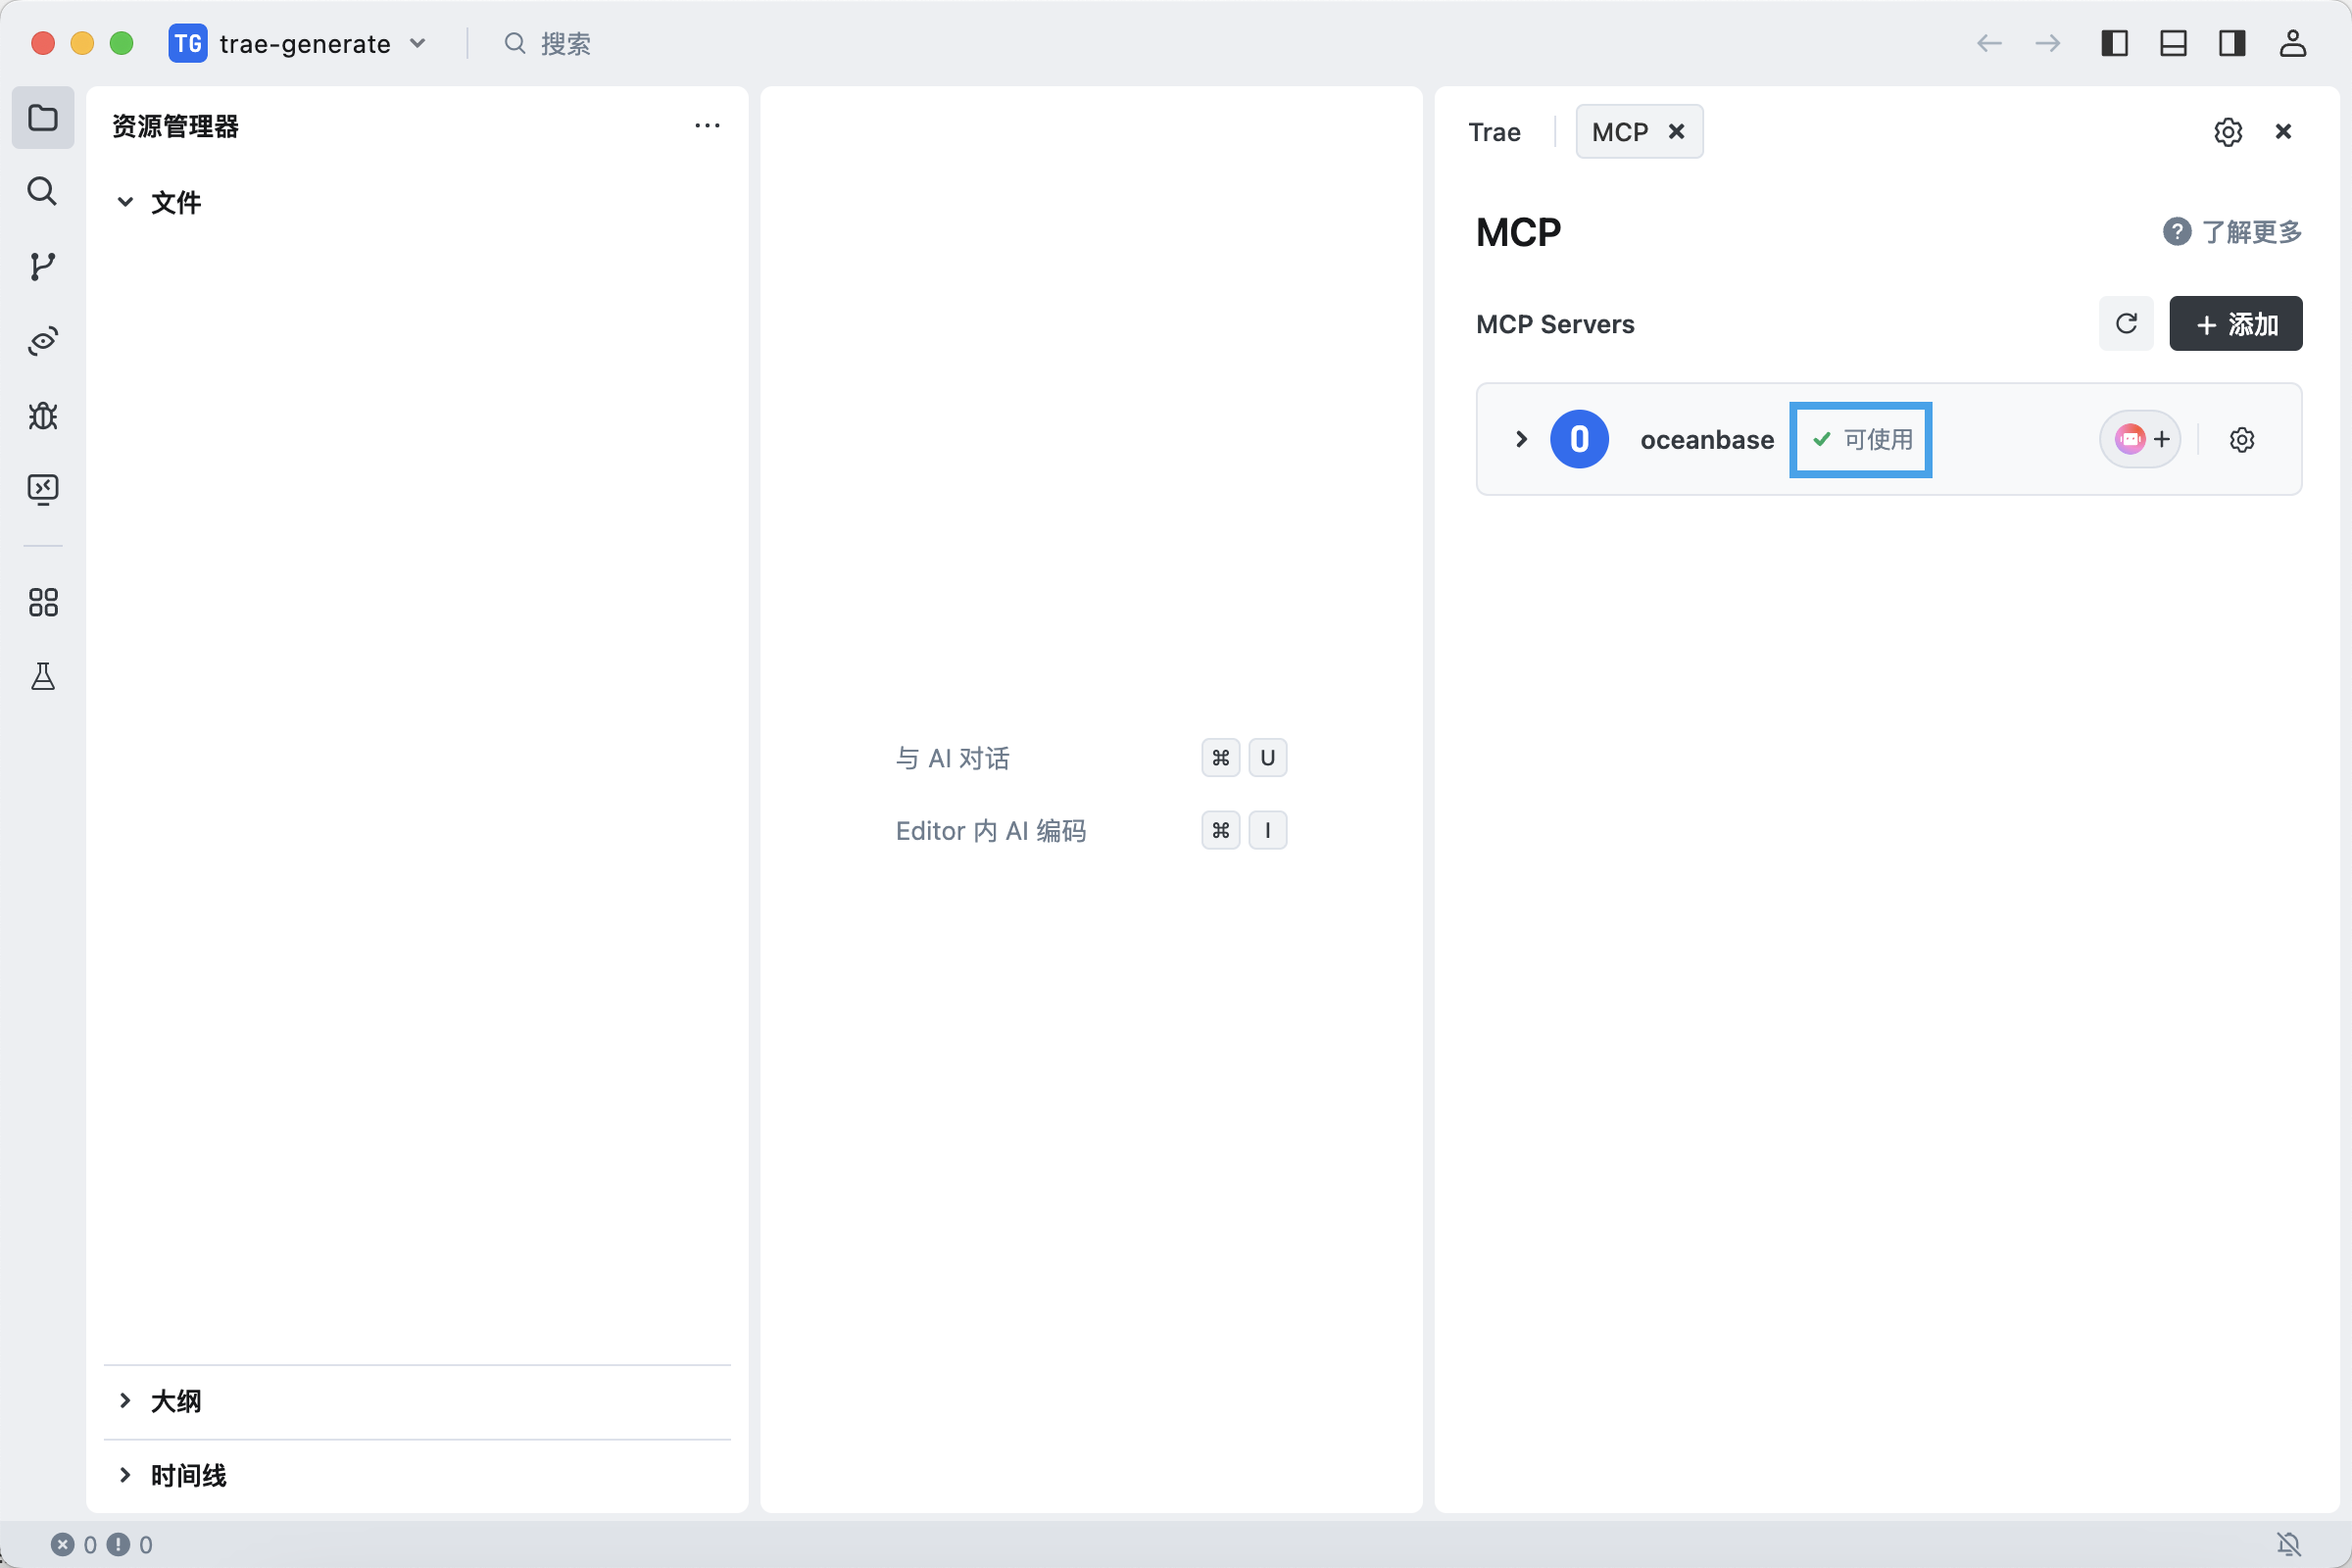
测试 MCP Server
选择
Builder with MCP智能体。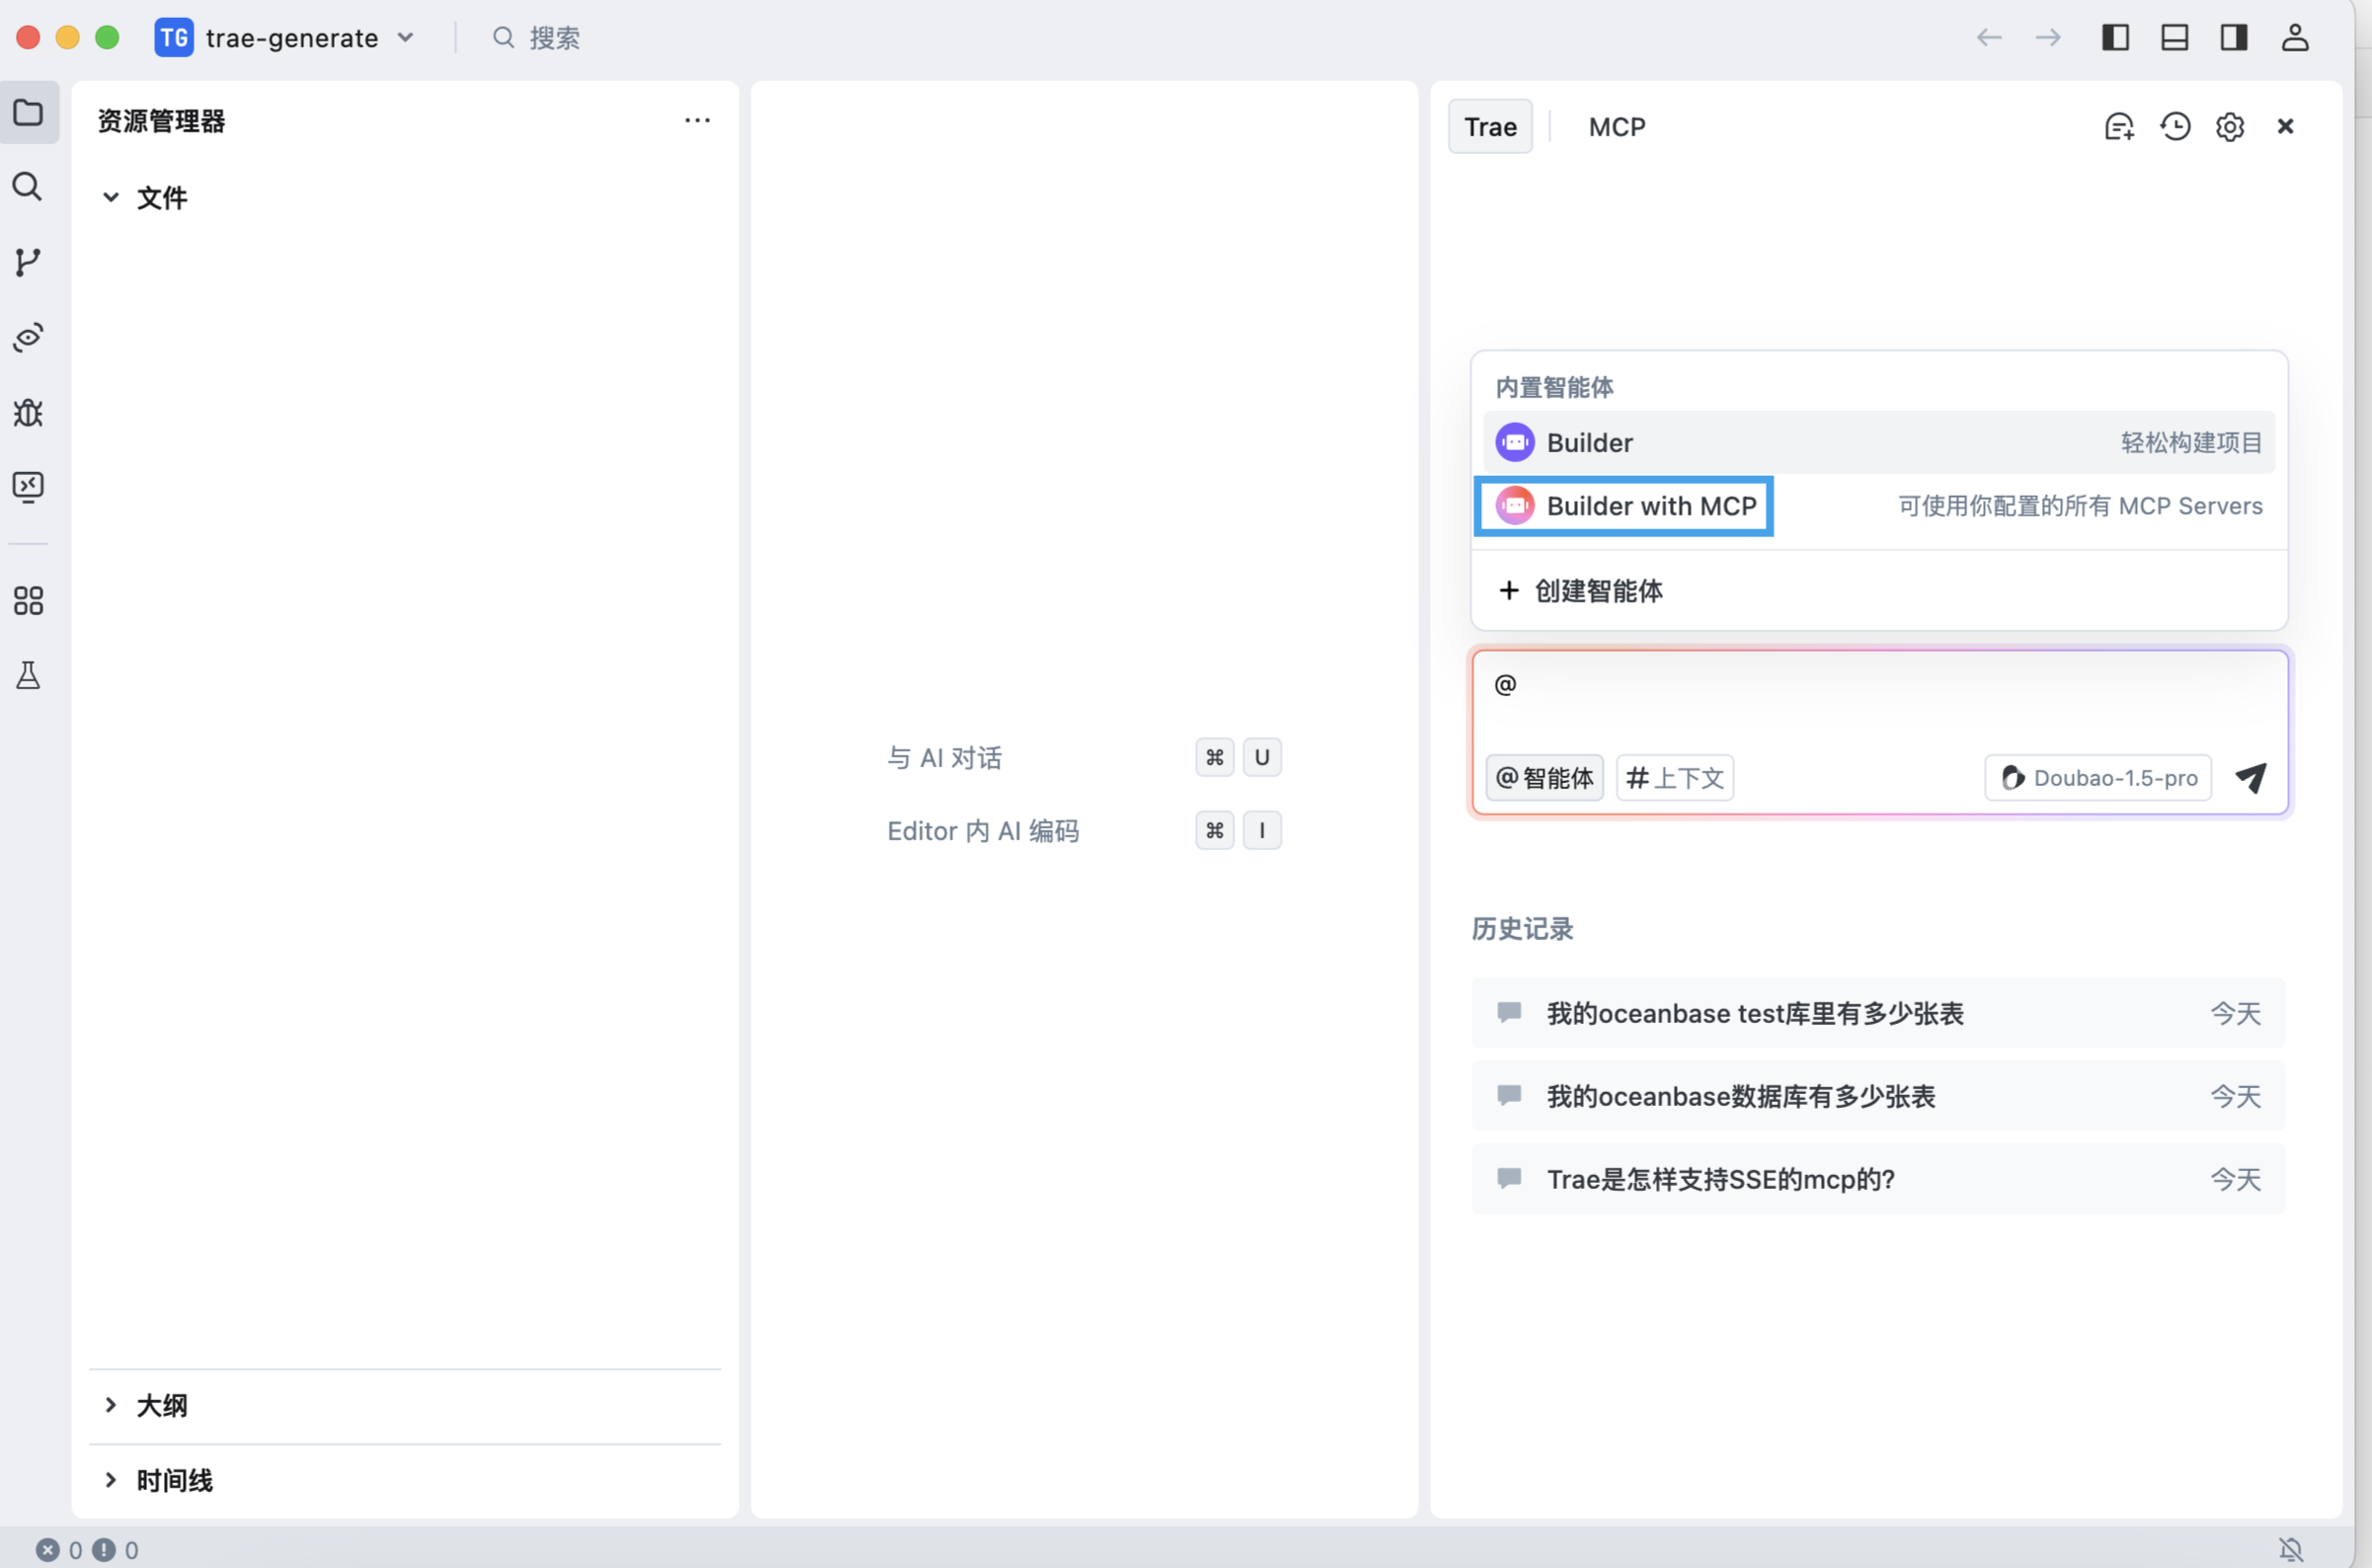
在对话框中输入提示:
test 库中有多少张表?,Trae 客户端会展示即将执行的 SQL 语句。确认无误后,点击运行按钮执行查询。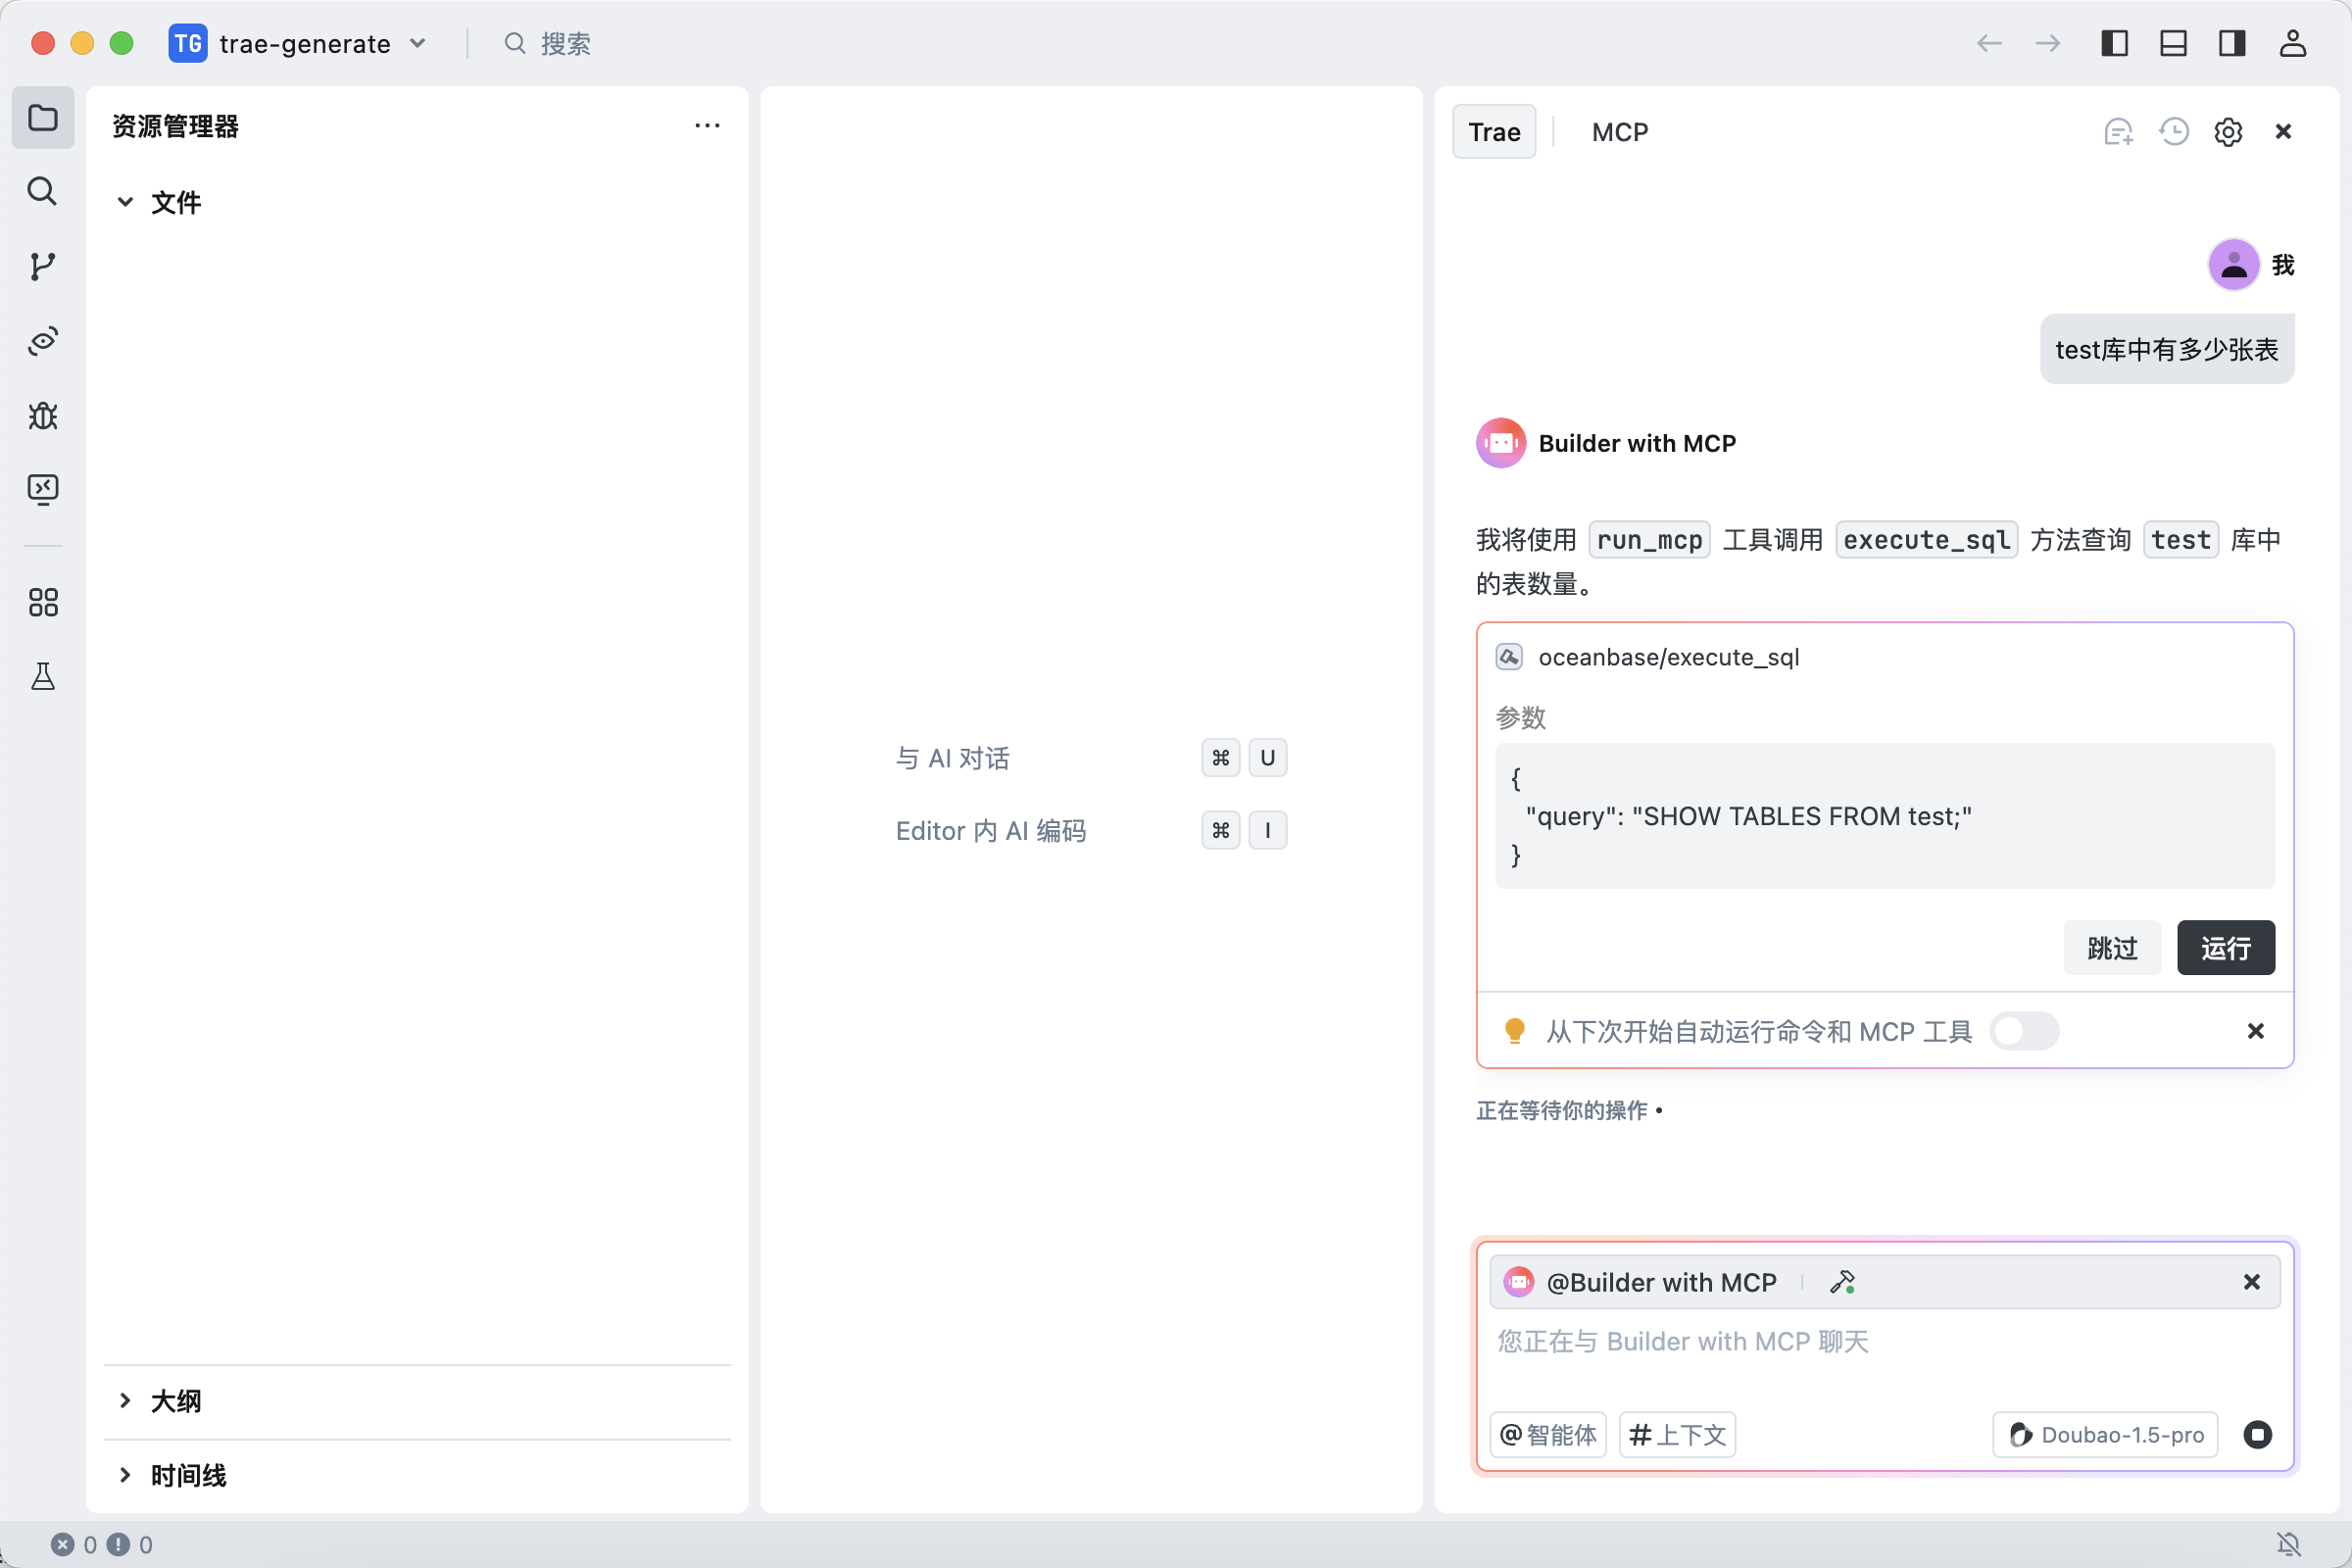
Trae 客户端会展示
test库中的所有表名称,这表明我们已经成功连接到 OceanBase 数据库。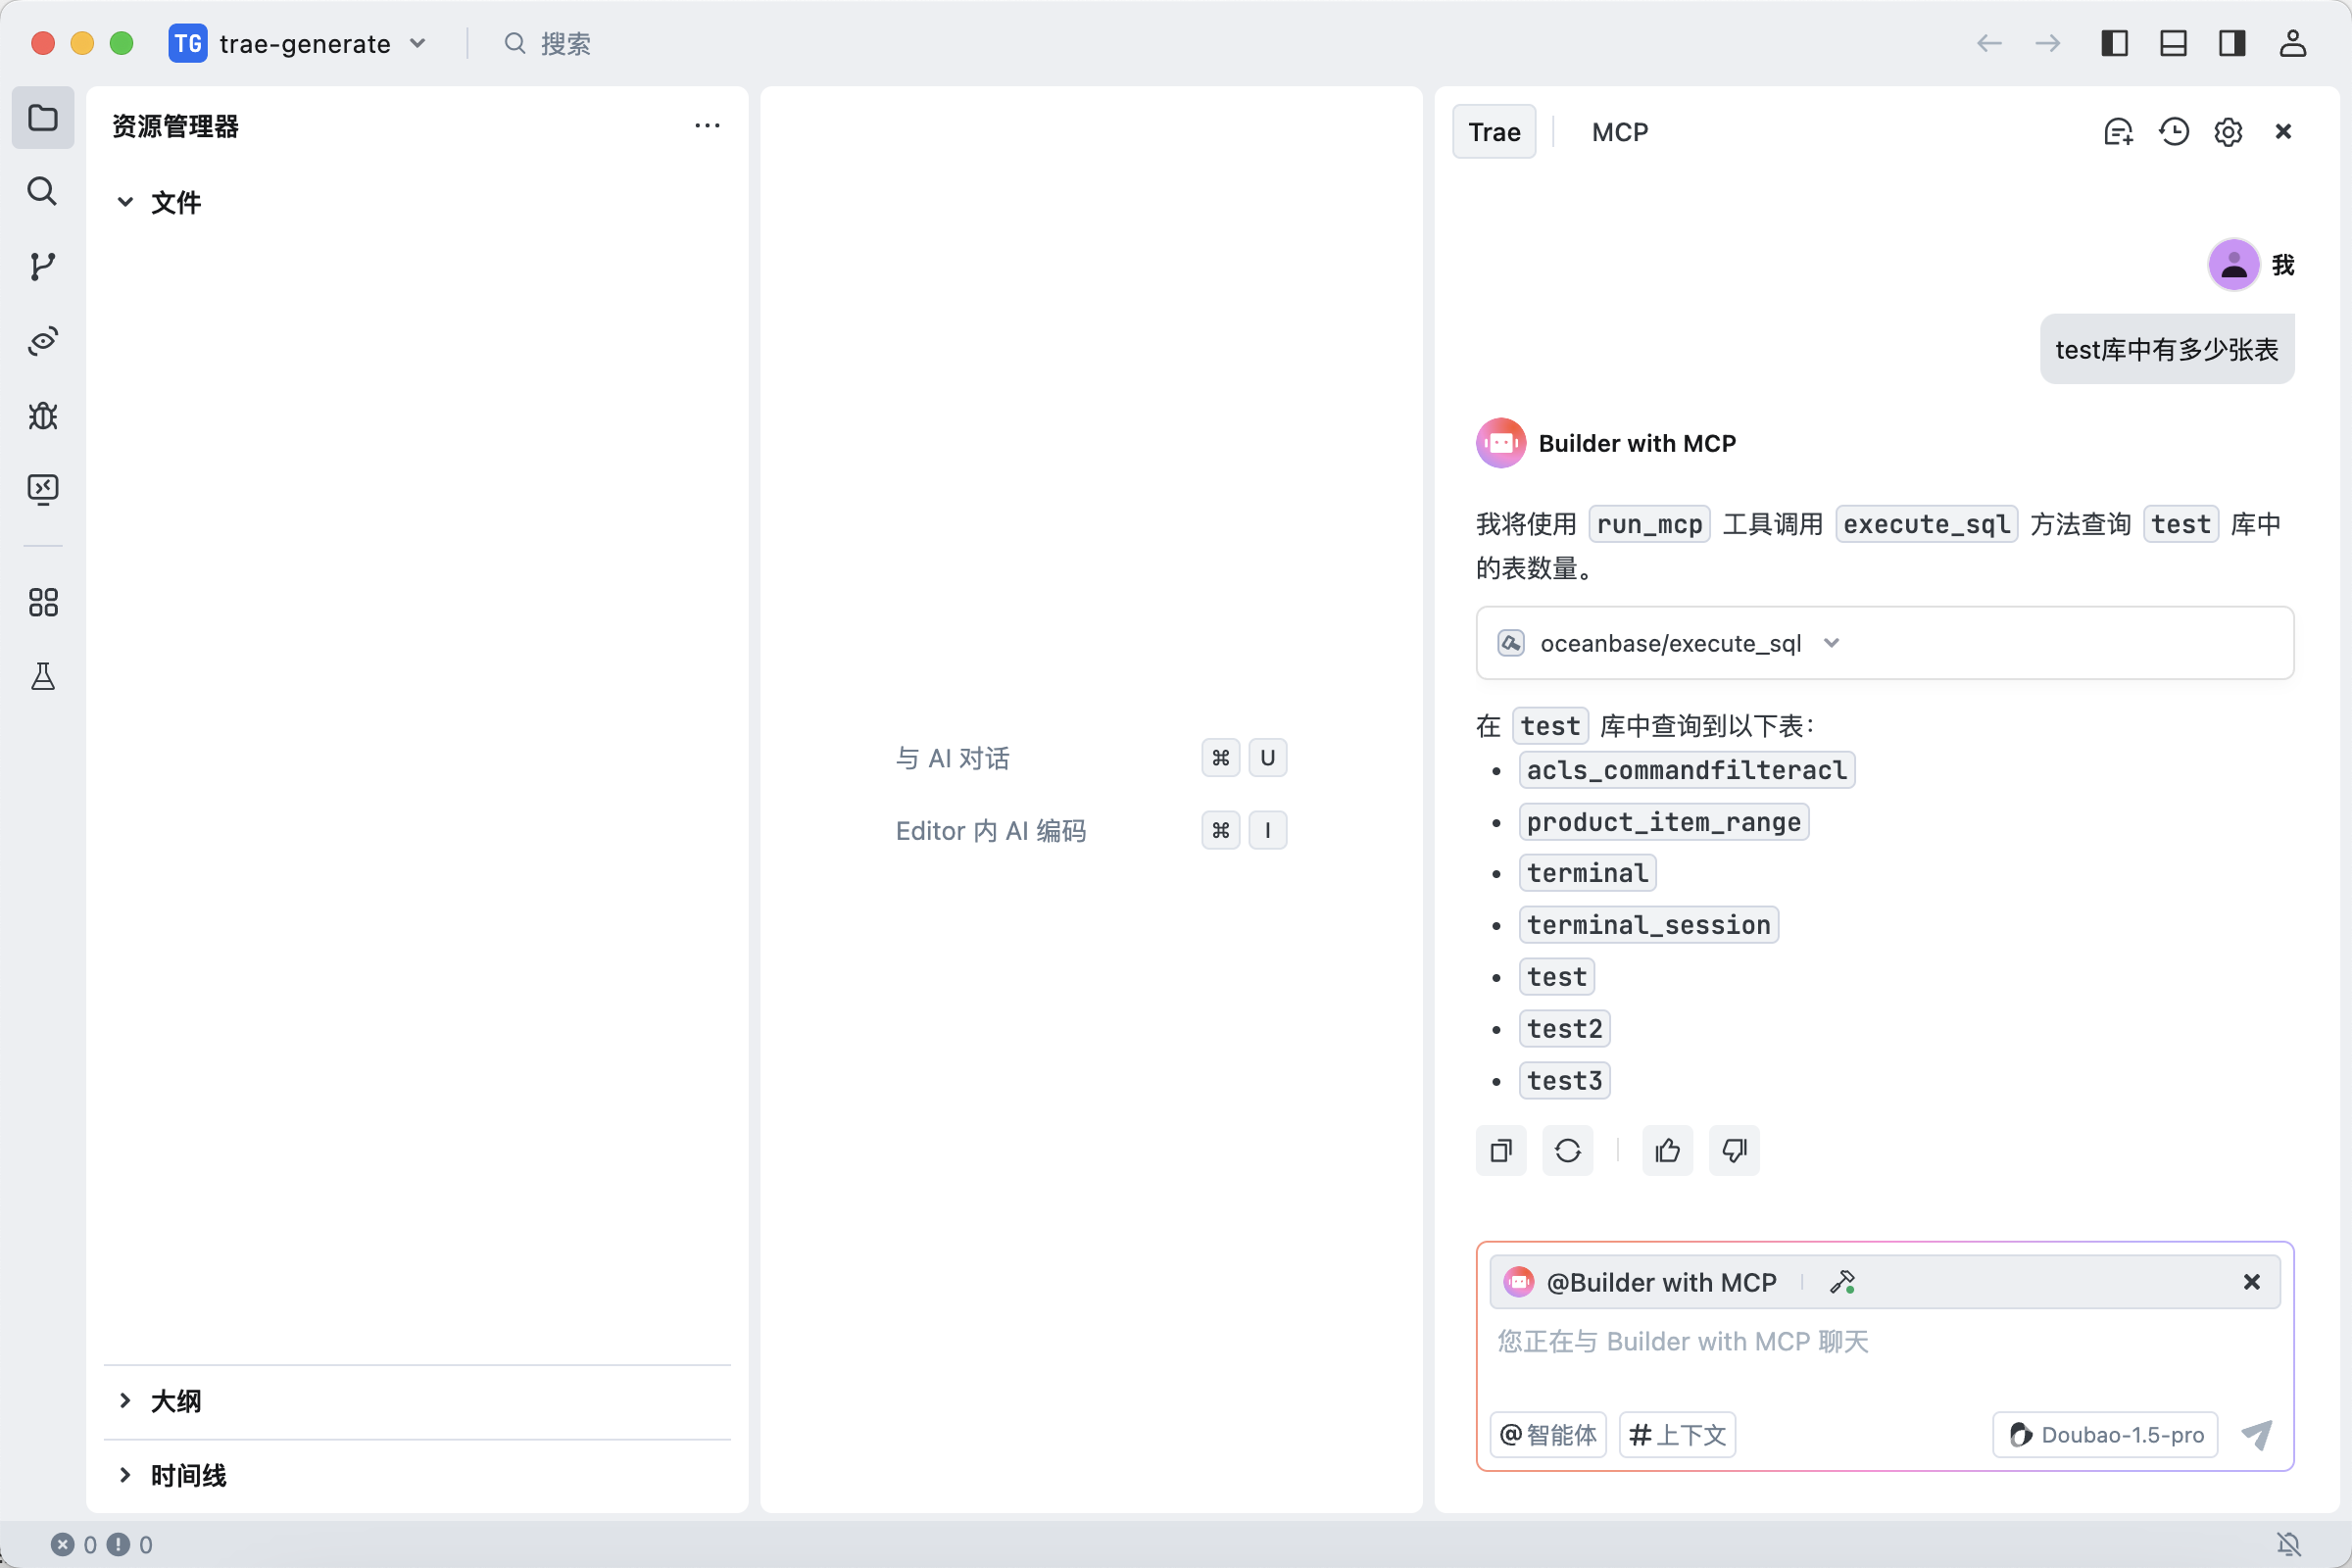
使用 FastAPI 快速创建 RESTful API 风格的项目
你可以使用 FastAPI 快速创建 RESTful API 风格的项目。FastAPI 是一个 Python 的 Web 框架,可以快速构建 RESTful API。
创建 customer 表
在对话框中输入提示:
创建一个 customer 表,主键是 ID,包含 name,age,telephone,location 字段,确认 SQL 语句后,点击运行按钮执行查询。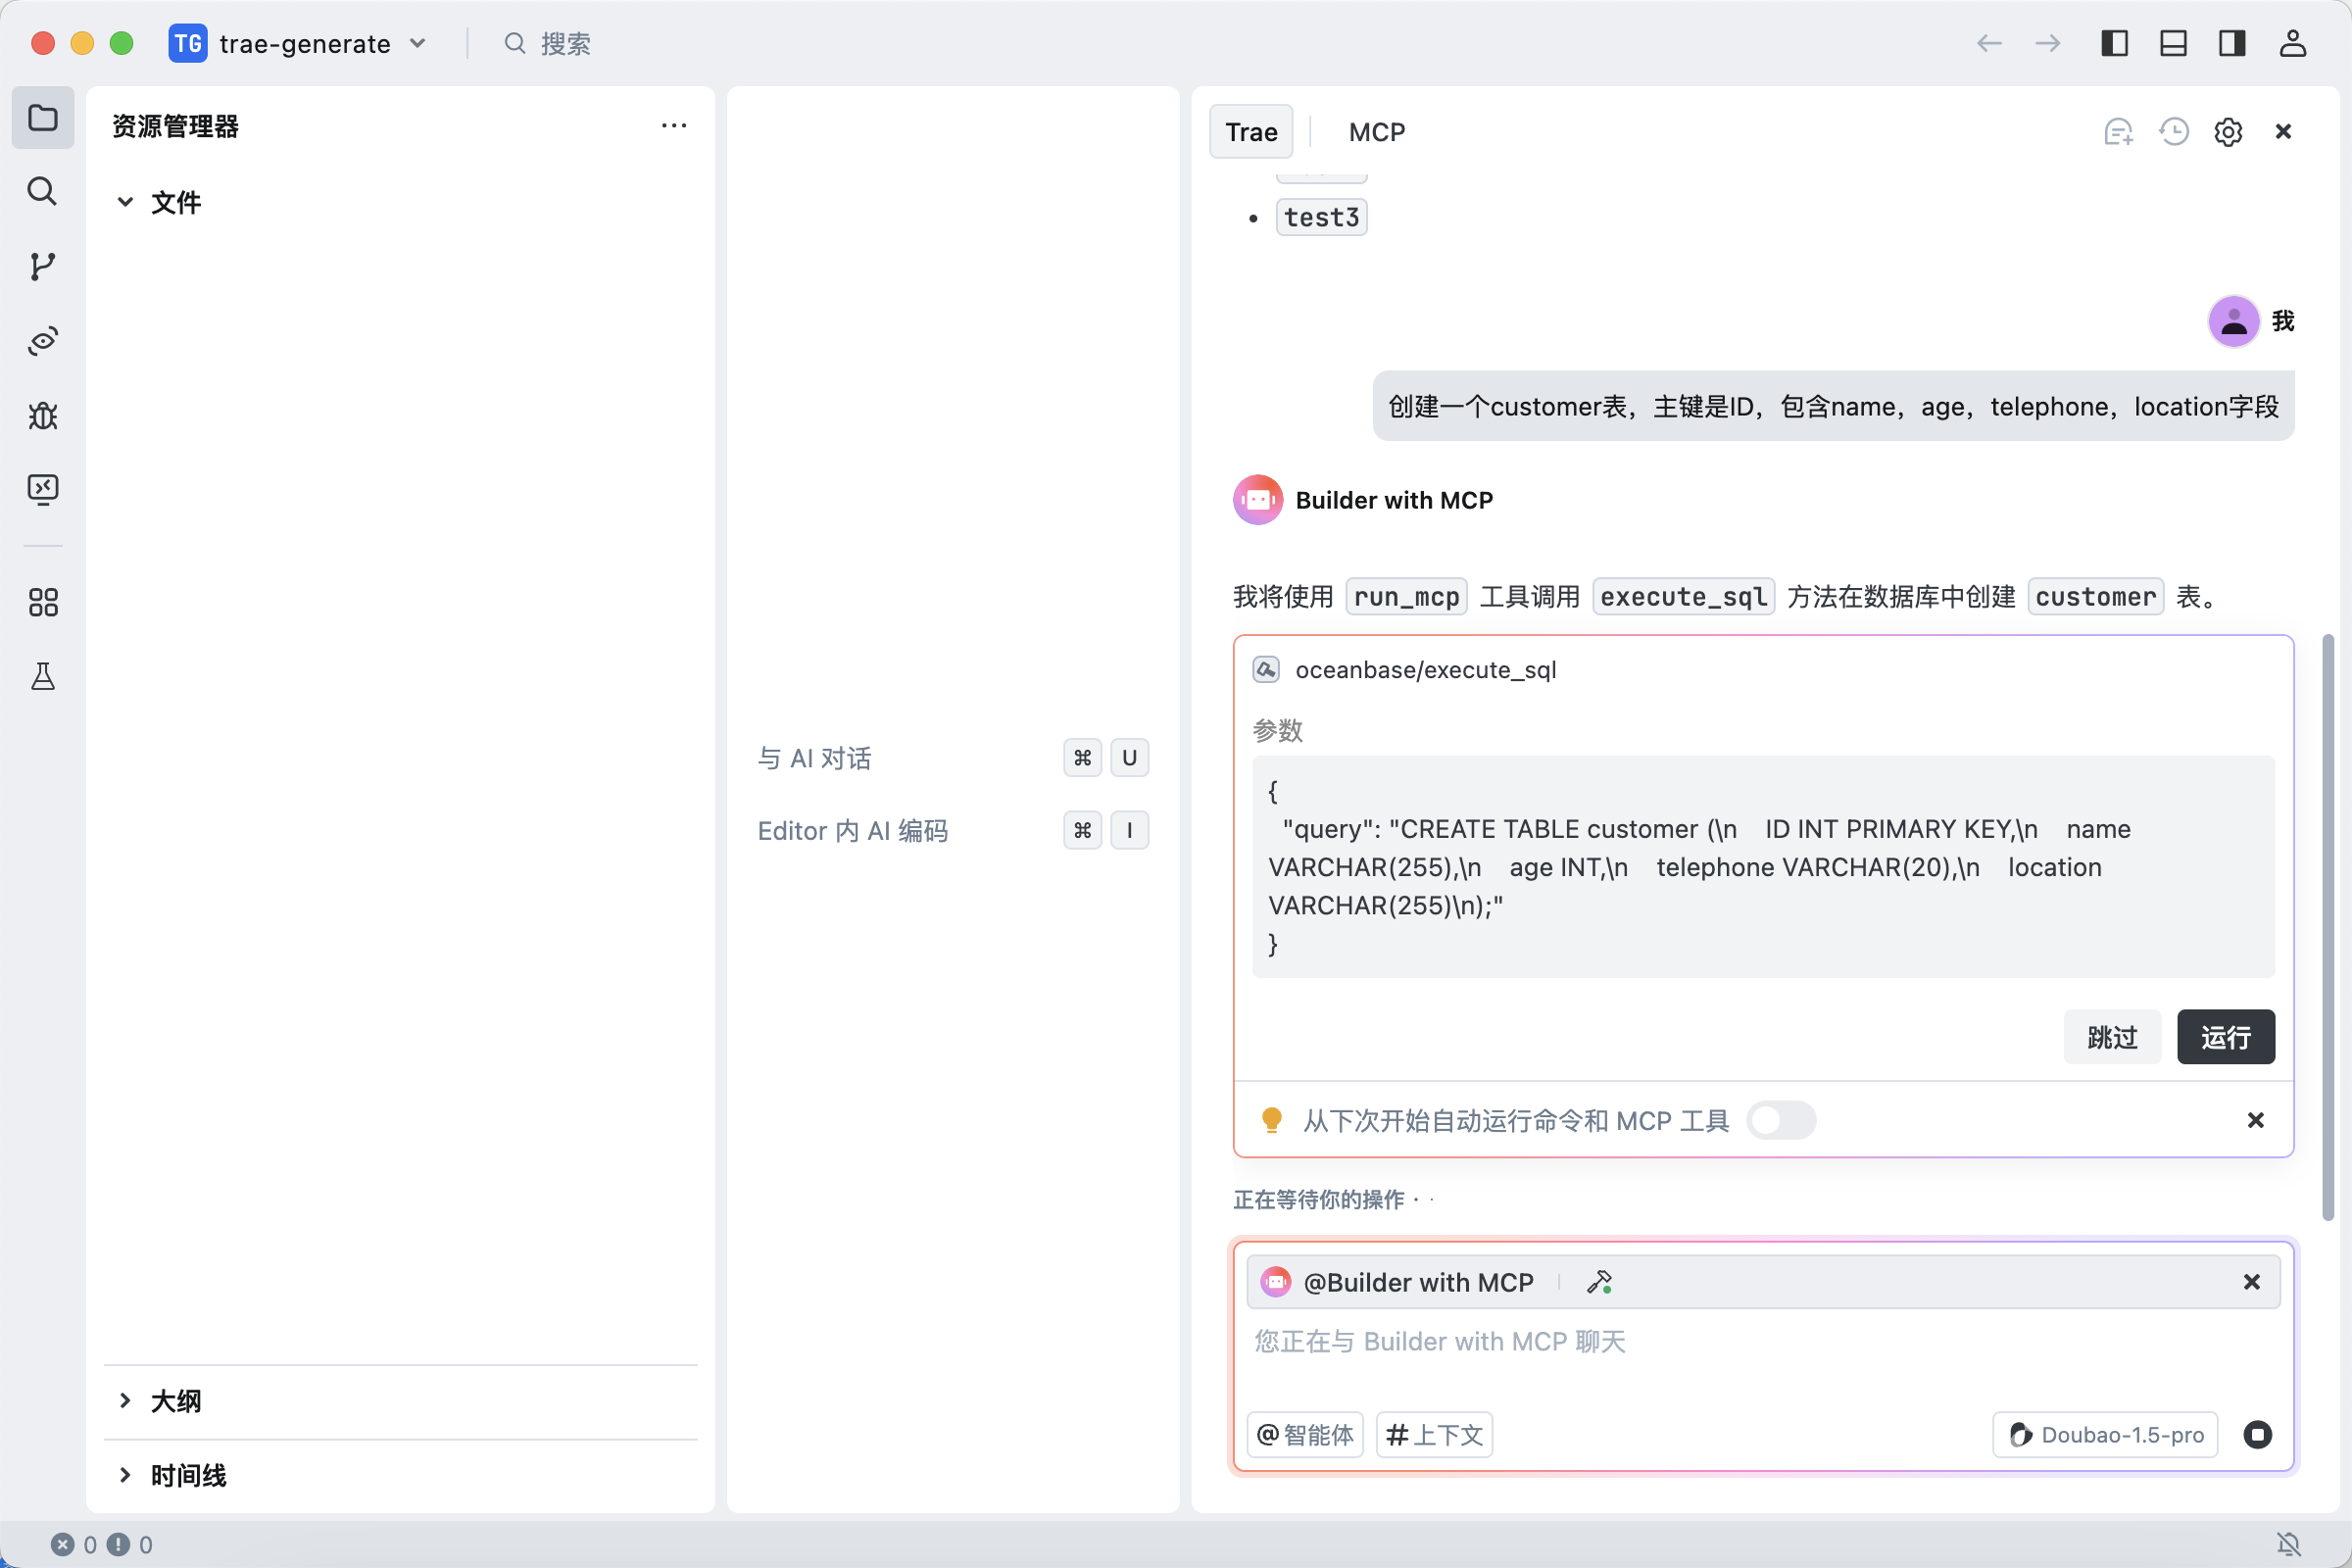
插入测试数据
在对话框中输入提示:
向 customer 表中插入 10 条数据,确认 SQL 语句后,点击运行按钮执行查询。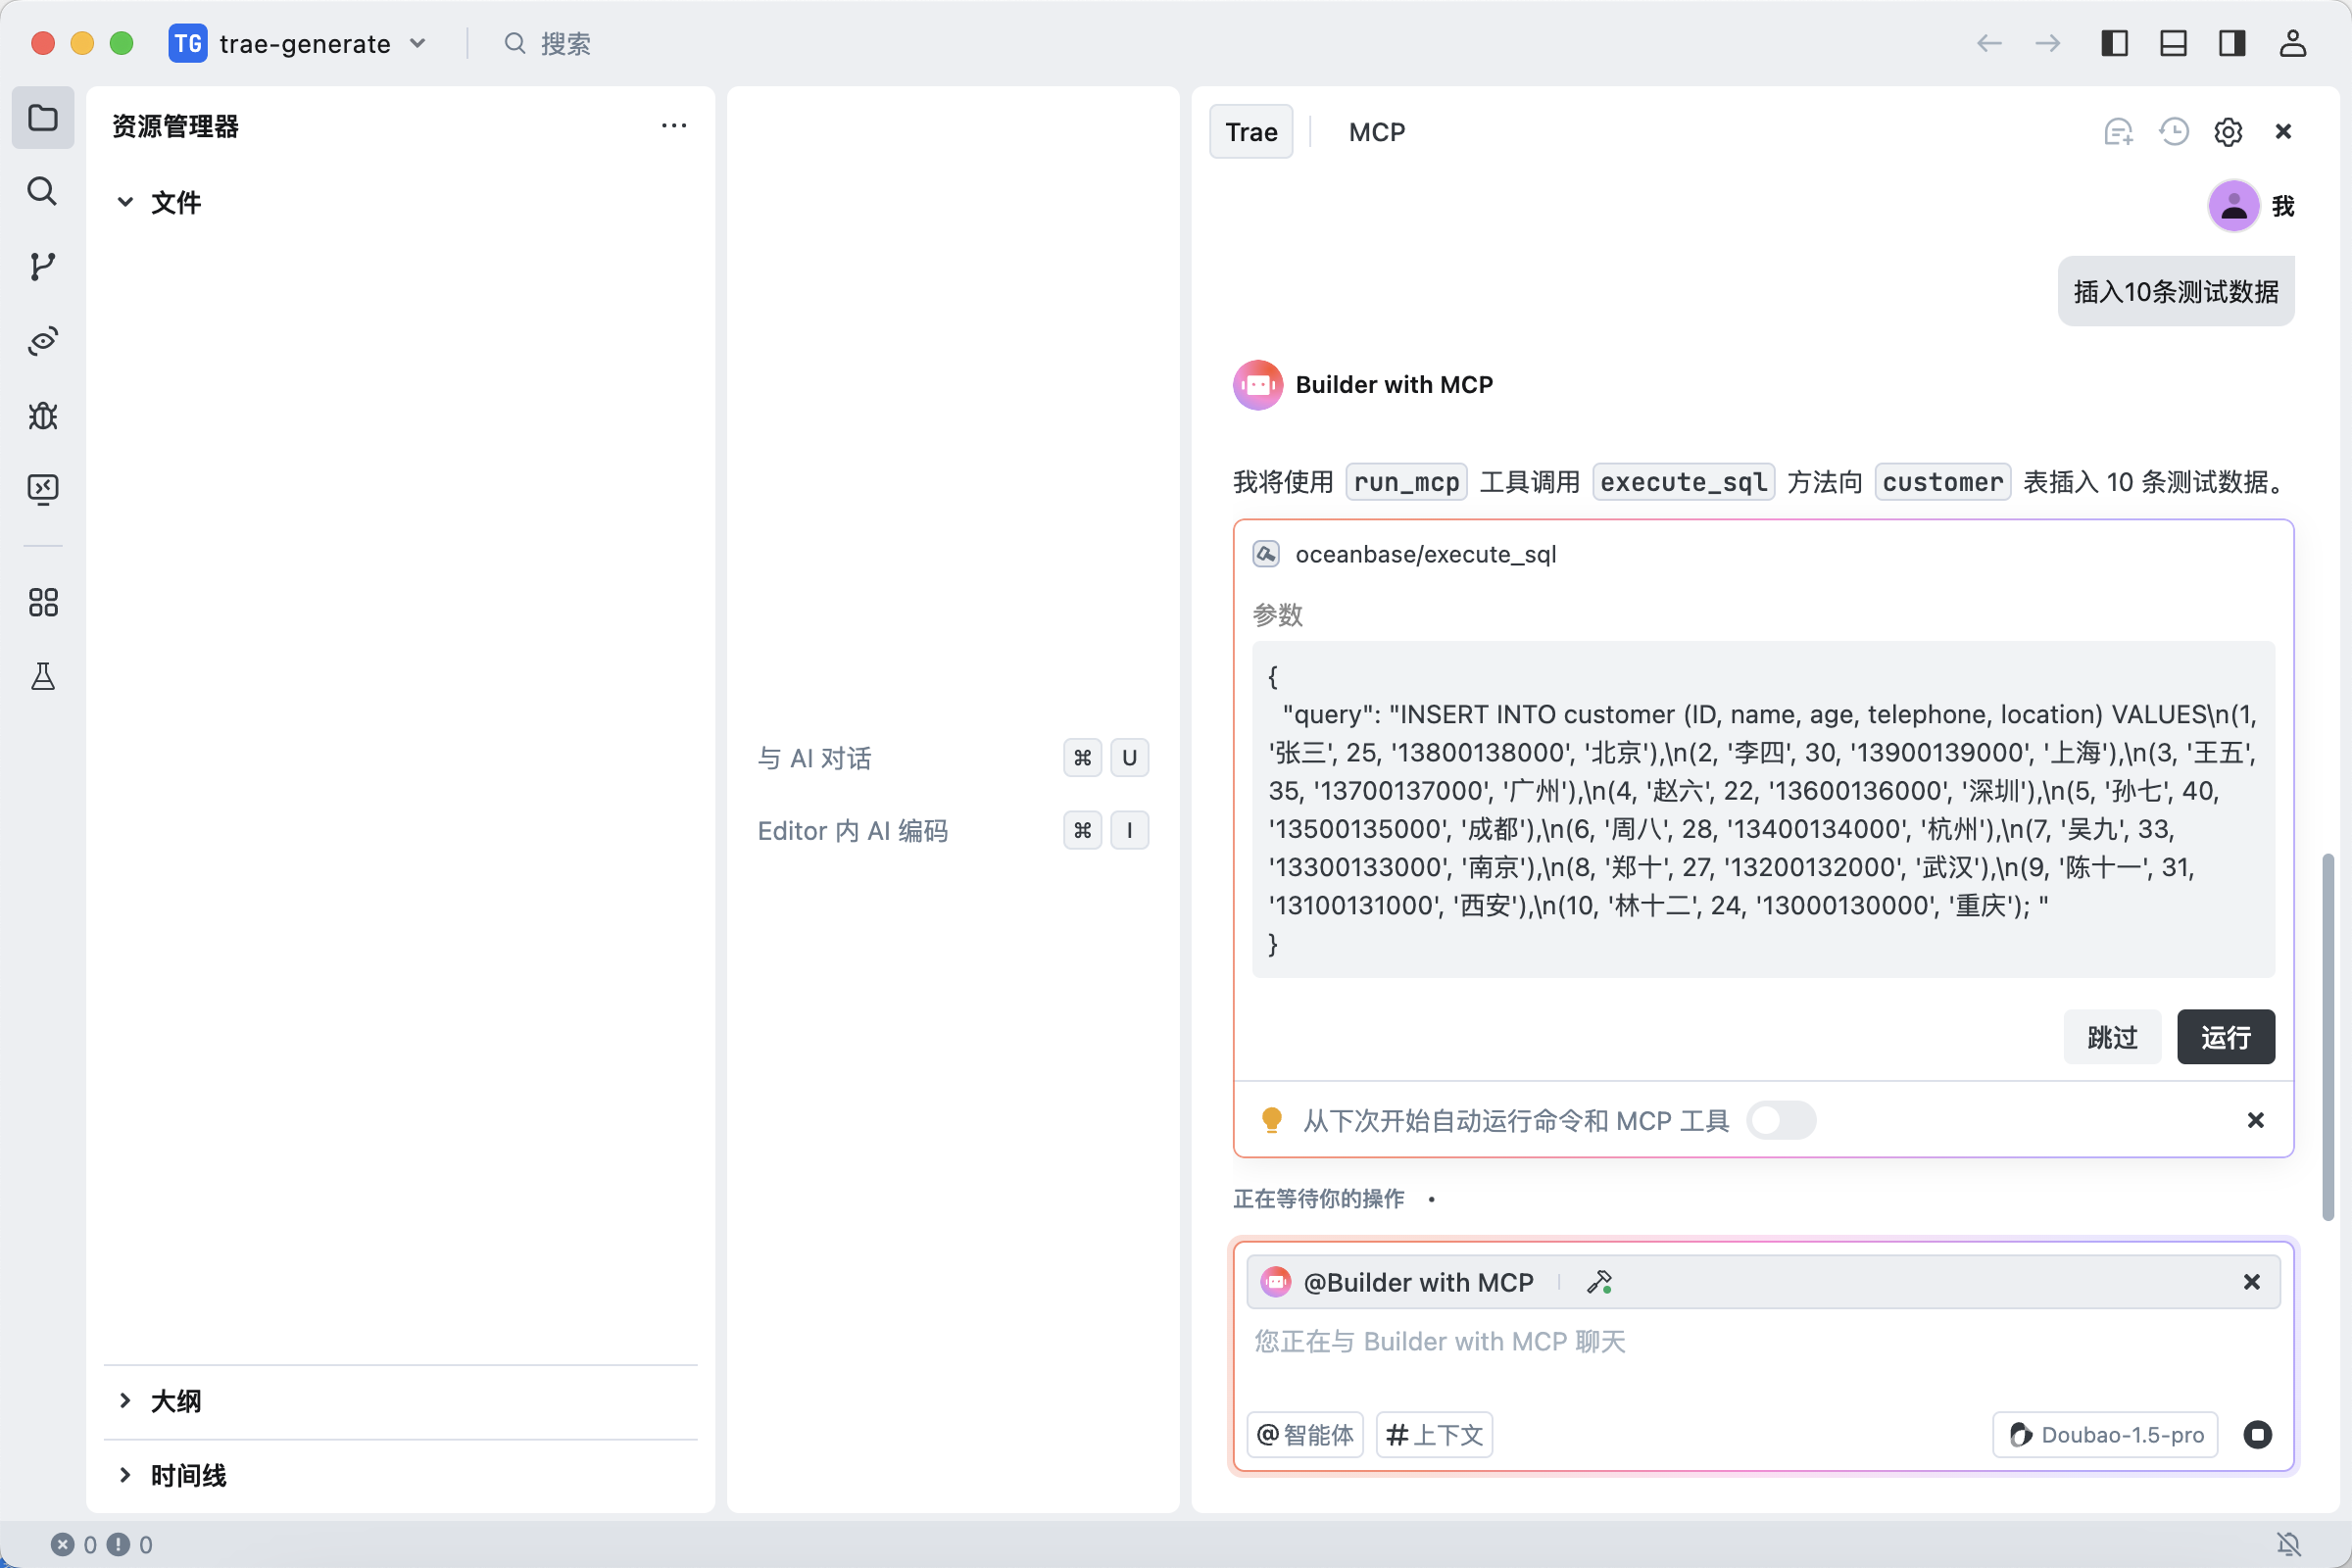
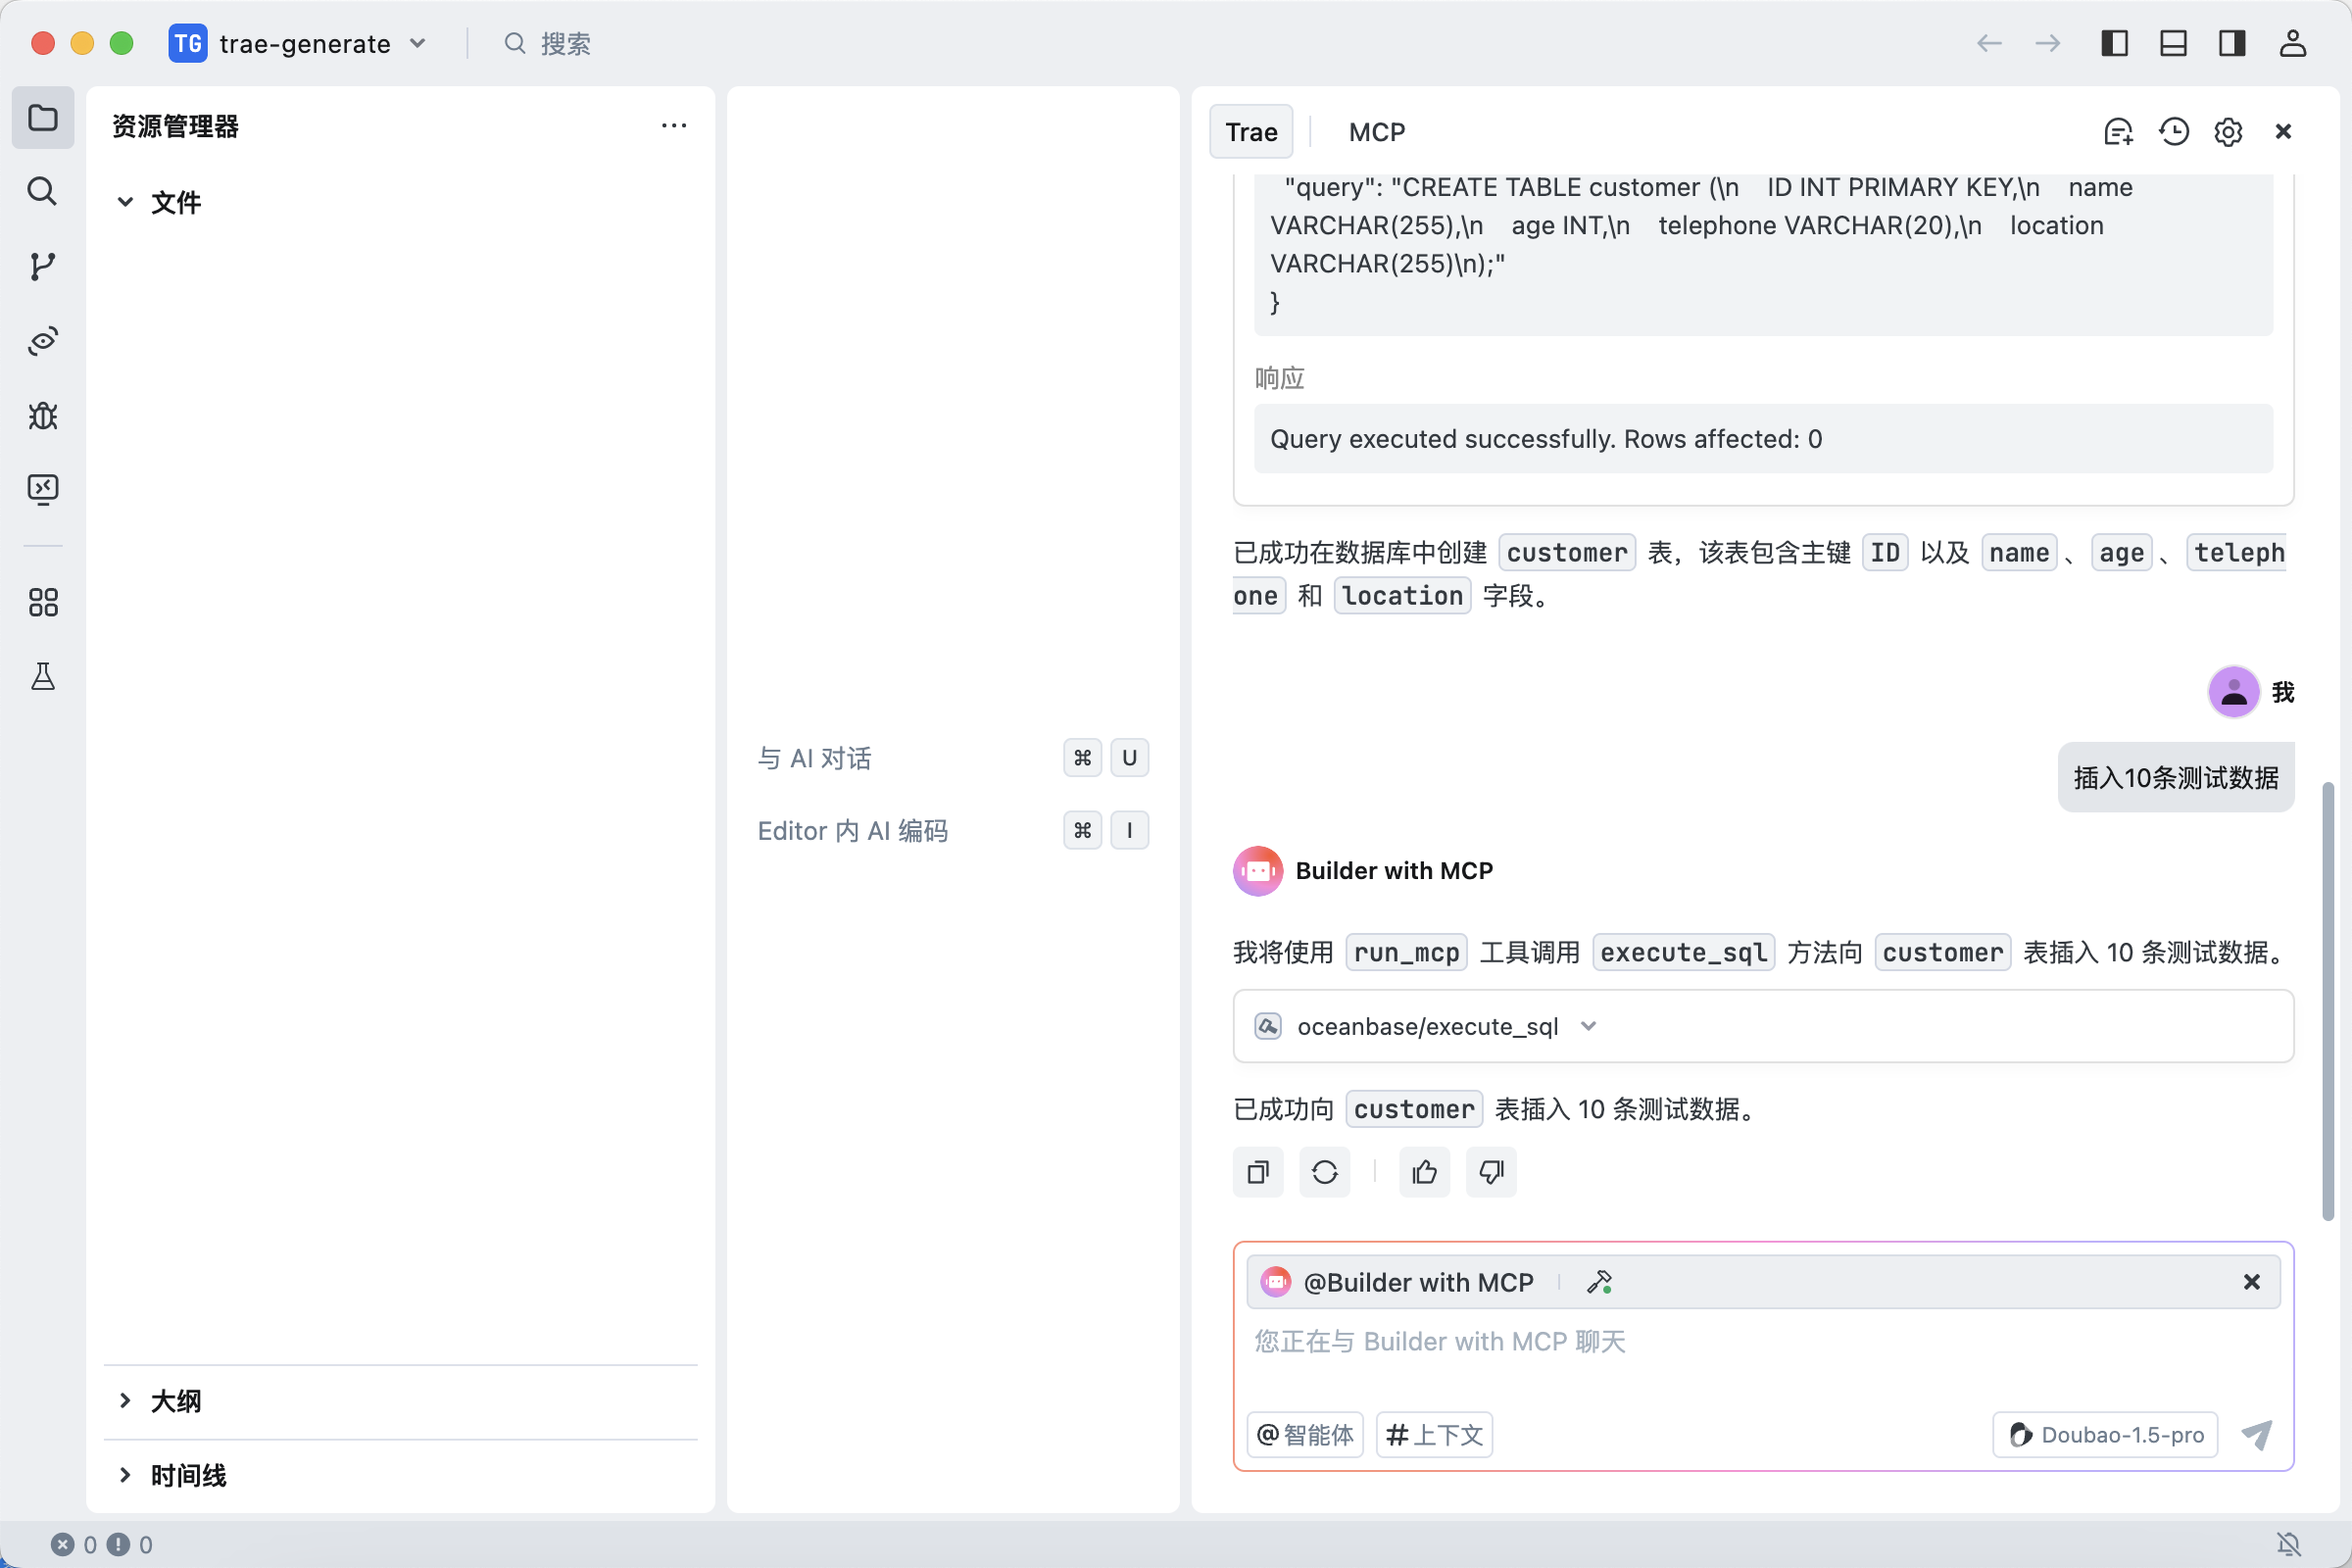
插入成功后,会展示执行结果:
创建 FastAPI 项目
在对话框中输入提示:
创建一个 FastAPI 项目,生成基于 customer 表的 RESTful API,确认 SQL 语句后,点击运行按钮执行查询。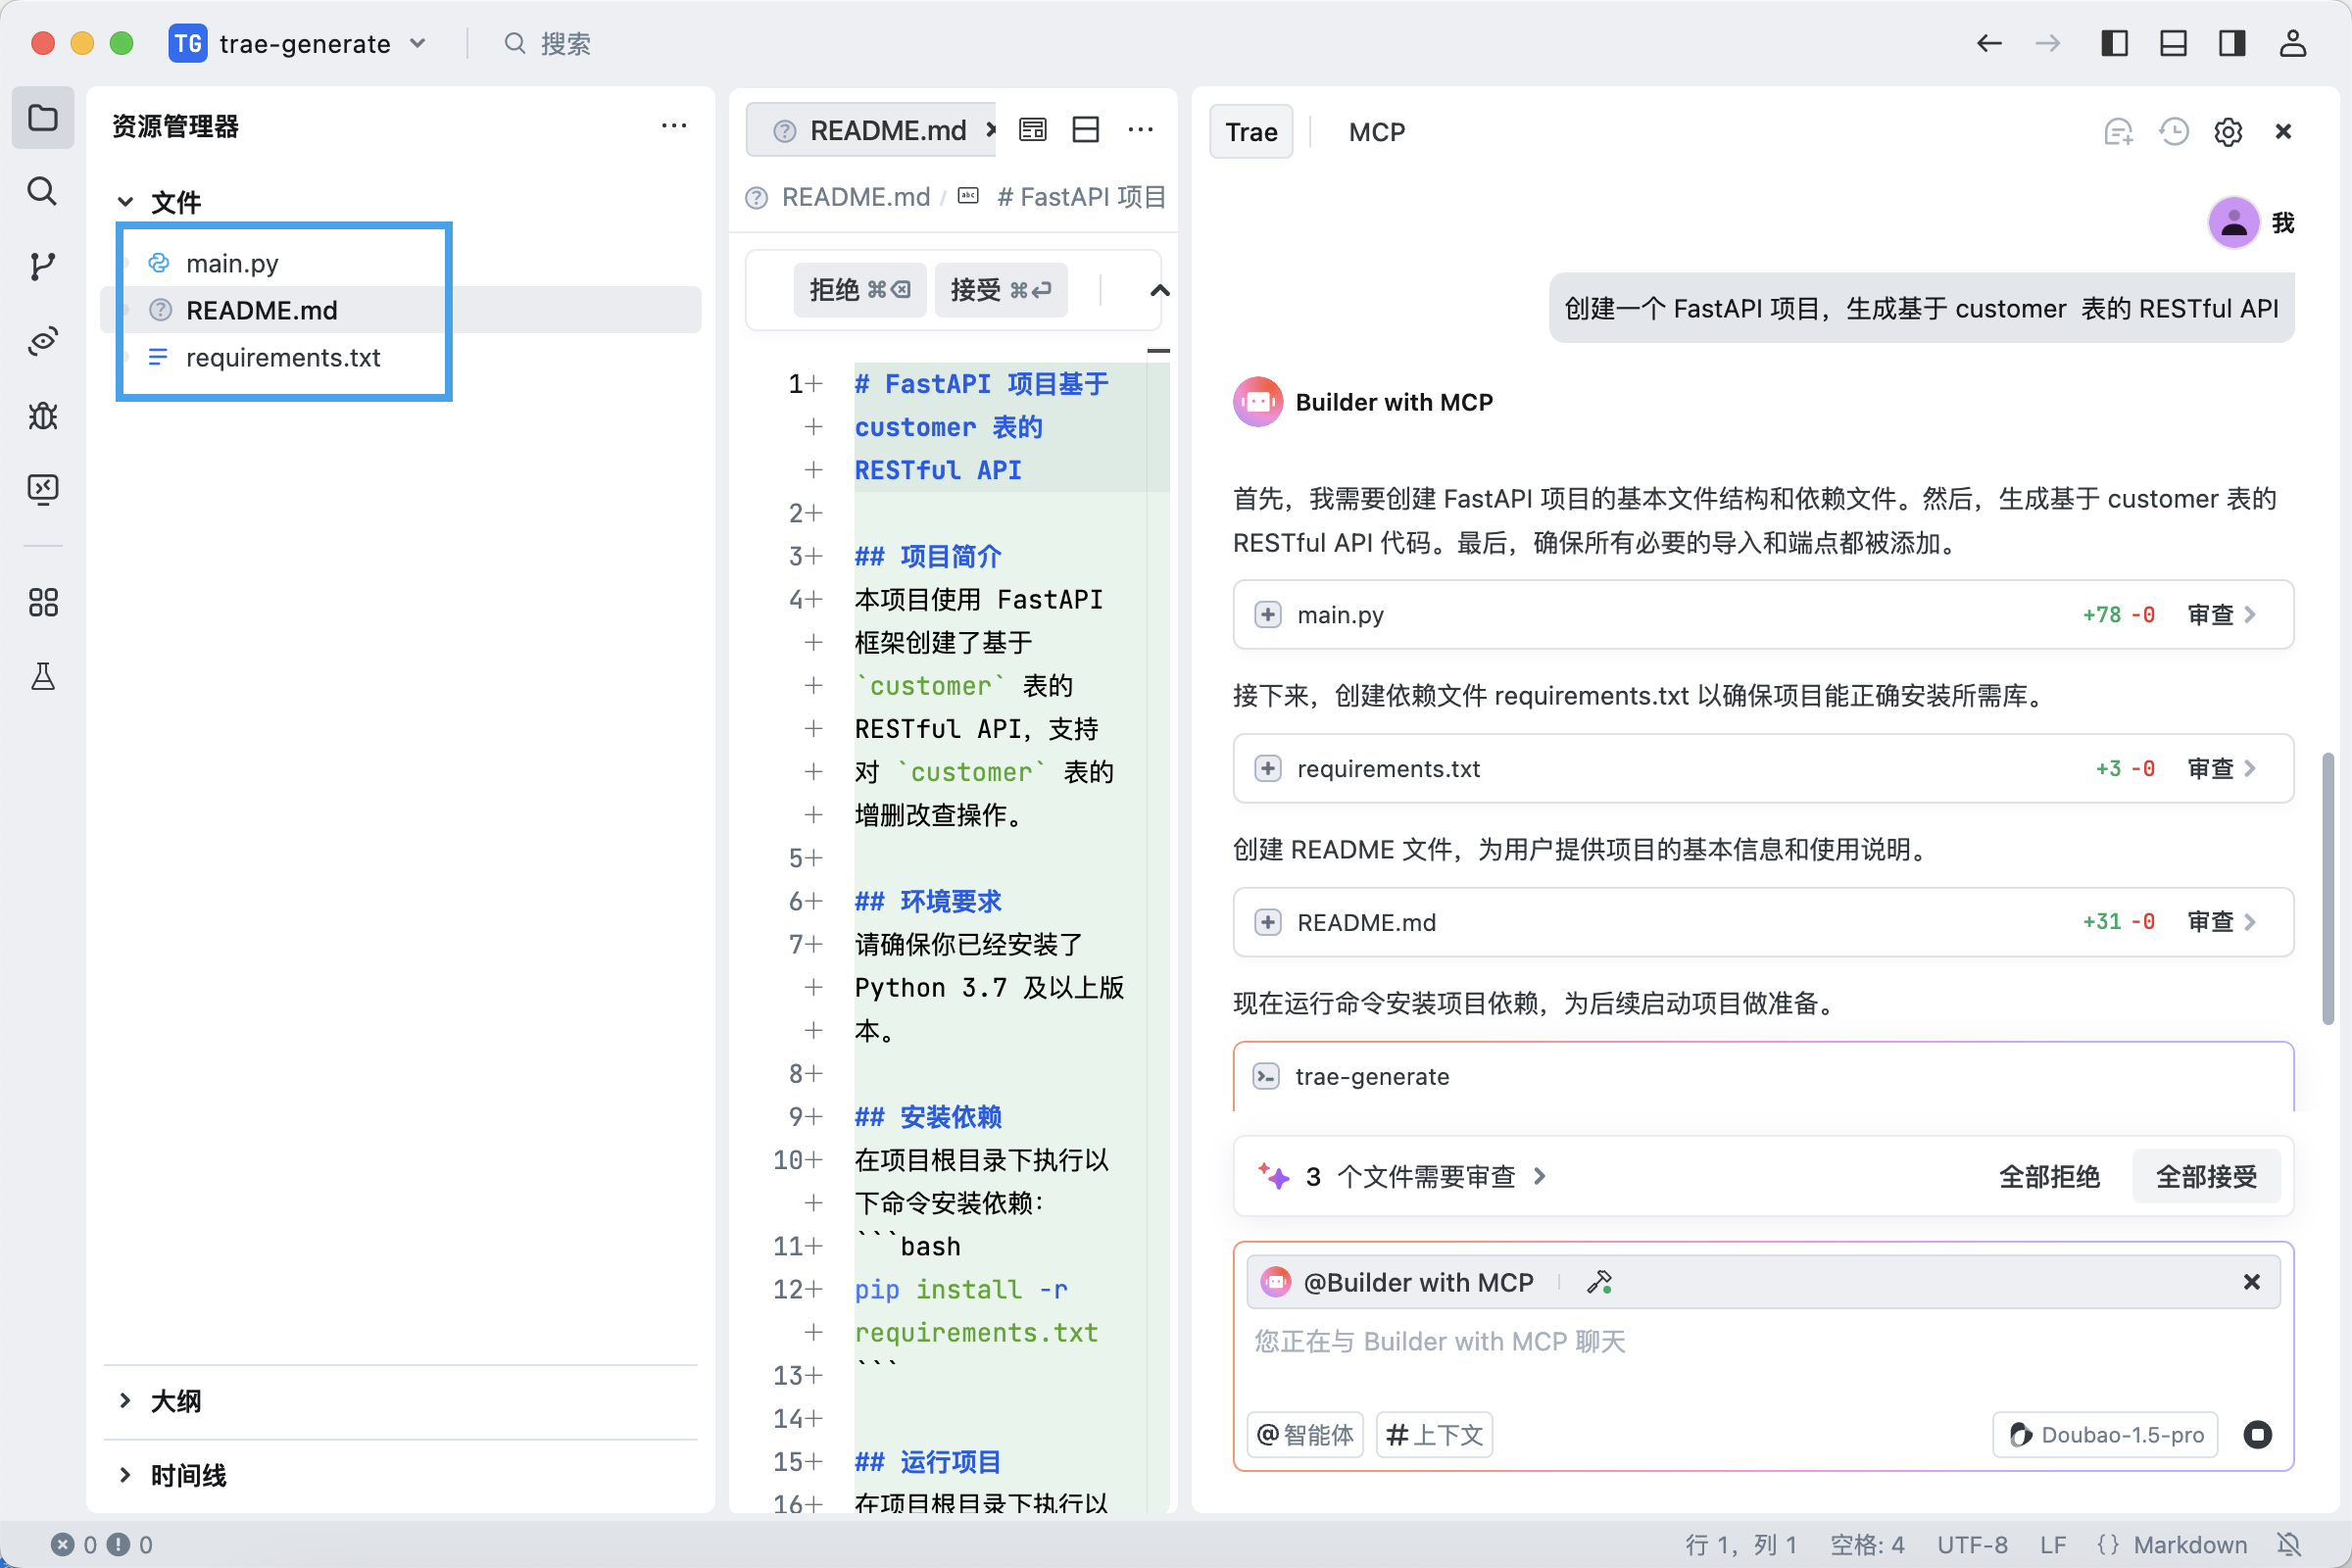
此步骤将自动生成三个文件。建议首次使用时选择 "全部接受",因为 AI 生成的文件内容可能具有不确定性,后续可根据实际需求进行调整。
创建虚拟环境并安装依赖
执行如下命令,在当前目录下使用 uv 包管理工具创建虚拟环境,并安装依赖包:
uv venv source .venv/bin/activate uv pip install -r requirements.txt启动 FastAPI 项目
执行如下命令,启动 FastAPI 项目:
uvicorn main:app --reload查看表中数据
在命令行中运行如下命令,或者使用其他请求工具,查看表中的数据:
curl http://127.0.0.1:8000/customers返回结果如下:
[{"ID":1,"name":"张三","age":25,"telephone":"13800138000","location":"北京"},{"ID":2,"name":"李四","age":30,"telephone":"13900139000","location":"上海"},{"ID":3,"name":"王五","age":35,"telephone":"13700137000","location":"广州"},{"ID":4,"name":"赵六","age":22,"telephone":"13600136000","location":"深圳"},{"ID":5,"name":"孙七","age":40,"telephone":"13500135000","location":"成都"},{"ID":6,"name":"周八","age":28,"telephone":"13400134000","location":"杭州"},{"ID":7,"name":"吴九","age":33,"telephone":"13300133000","location":"南京"},{"ID":8,"name":"郑十","age":27,"telephone":"13200132000","location":"武汉"},{"ID":9,"name":"陈十一","age":31,"telephone":"13100131000","location":"西安"},{"ID":10,"name":"林十二","age":24,"telephone":"13000130000","location":"重庆"}]可以看到增、删、改、查的 RESTful API 已经成功生成:
from fastapi import FastAPI from pydantic import BaseModel import mysql.connector app = FastAPI() # 数据库连接配置 config = { 'user': '*******', 'password': '******', 'host': 'xx.xxx.xxx.xx', 'database': 'test', 'port':xxxx, 'raise_on_warnings': True } class Customer(BaseModel): id: int name: str age: int telephone: str location: str @app.get('/customers') async def get_customers(): cnx = mysql.connector.connect(**config) cursor = cnx.cursor(dictionary=True) query = 'SELECT * FROM customer' cursor.execute(query) results = cursor.fetchall() cursor.close() cnx.close() return results @app.get('/customers/{customer_id}') async def get_customer(customer_id: int): cnx = mysql.connector.connect(**config) cursor = cnx.cursor(dictionary=True) query = 'SELECT * FROM customer WHERE ID = %s' cursor.execute(query, (customer_id,)) result = cursor.fetchone() cursor.close() cnx.close() return result @app.post('/customers') async def create_customer(customer: Customer): cnx = mysql.connector.connect(**config) cursor = cnx.cursor() query = 'INSERT INTO customer (ID, name, age, telephone, location) VALUES (%s, %s, %s, %s, %s)' data = (customer.id, customer.name, customer.age, customer.telephone, customer.location) cursor.execute(query, data) cnx.commit() cursor.close() cnx.close() return {'message': 'Customer created successfully'} @app.put('/customers/{customer_id}') async def update_customer(customer_id: int, customer: Customer): cnx = mysql.connector.connect(**config) cursor = cnx.cursor() query = 'UPDATE customer SET name = %s, age = %s, telephone = %s, location = %s WHERE ID = %s' data = (customer.name, customer.age, customer.telephone, customer.location, customer_id) cursor.execute(query, data) cnx.commit() cursor.close() cnx.close() return {'message': 'Customer updated successfully'} @app.delete('/customers/{customer_id}') async def delete_customer(customer_id: int): cnx = mysql.connector.connect(**config) cursor = cnx.cursor() query = 'DELETE FROM customer WHERE ID = %s' cursor.execute(query, (customer_id,)) cnx.commit() cursor.close() cnx.close() return {'message': 'Customer deleted successfully'}


