
基于湖库一体架构,统一管理结构化、半结构化与非结构化等多模态数据,一个系统承载事务处理、实时分析与 AI 工作负载。


使用 Flink-OMT 从 StarRocks 数据库同步数据到 OceanBase 数据库
更新时间:2026-04-09 14:12:04
编辑
分享
本文档将介绍如何使用 Flink-OMT 从 StarRocks 数据库同步数据到 OceanBase 数据库,包括示例环境准备、数据准备、任务配置和验证等完整流程。
背景信息
Flink-OMT(flink-oceanbase-migrate-tool)是 OceanBase 提供的一款基于 Apache Flink 的数据迁移工具,支持从 StarRocks 数据库实时同步数据到 OceanBase 数据库。Flink-OMT 提供端到端的数据集成框架,具备表结构自动同步的能力,支持多库多表同步以及多库多表路由同步,为 StarRocks 数据迁移到 OceanBase 提供高效、可靠的解决方案。
如果您在使用过程中遇到任何问题,欢迎在 GitHub Issues 页面提交问题反馈。
环境准备
系统要求
- 操作系统:Linux 或 MacOS
构建 Flink Standalone 集群环境
下载 Flink 1.19.1。解压后,使用如下命令打开
flink-1.19.1目录,并且设置FLINK_HOME为flink-1.19.1所在目录。cd flink-1.19.1在
conf/flink-conf.yaml配置文件中添加以下参数启用 checkpoint 机制,设置 checkpoint 间隔为 3000 毫秒。execution.checkpointing.interval: 3000在
conf/flink-conf.yaml配置文件中调整以下参数,增加每个 TaskManager 的 slot 数量。taskmanager: numberOfTaskSlots: 3启动 Flink 集群。
./bin/start-cluster.sh启动成功后,可以通过
http://localhost:8081/访问 Flink 页面,如下图所示。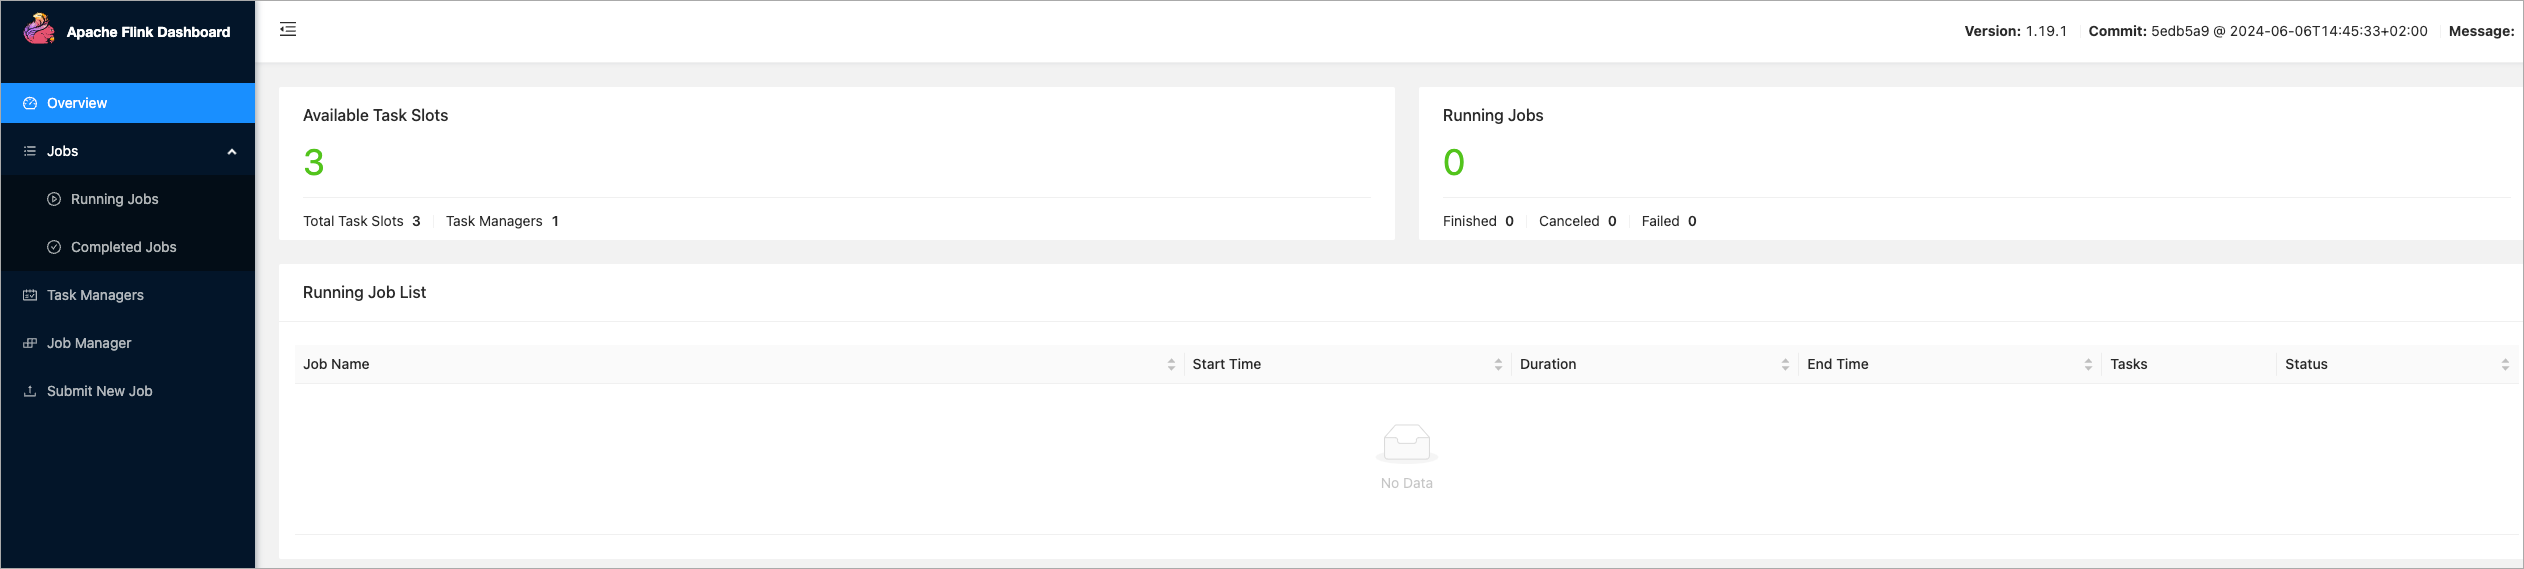
下载 Flink-OMT
下载 flink-omt JAR 包。
说明
您也可以访问 Flink-OMT GitHub 页面获取更多版本更新信息。
将 JAR 包移动到
FLINK_HOME的lib目录下。
准备数据库环境
本教程使用 Docker Compose 来部署 StarRocks 和 OceanBase 数据库进行演示。
构建 StarRocks 和 OceanBase Docker 示例环境
创建包含 StarRocks 和 OceanBase 的 Docker Compose 配置文件:
services:
StarRocks:
image: starrocks/allin1-ubuntu
ports:
- "8030:8030"
- "8040:8040"
- "9030:9030"
- "9060:9060"
OceanBase:
image: oceanbase/oceanbase-ce
ports:
- "2881:2881"
- "2882:2882"
environment:
- OB_TENANT_PASSWORD=123456
启动 StarRocks 和 OceanBase 服务
在 docker-compose.yml 文件所在目录下执行以下命令启动容器:
docker-compose up -d
该命令将以 detached 模式启动所有配置的容器。可以通过 docker ps 命令检查容器是否正常启动。
准备示例数据
准备 StarRocks 数据库数据
在 StarRocks 数据库中创建测试数据库和表,并插入示例数据。
连接到 StarRocks 数据库。
本示例使用 DBeaver 连接到 StarRocks,您也可以使用其他数据库客户端工具。连接信息如下:
连接方式:主机
服务器地址:
localhost端口:
9030用户名:
root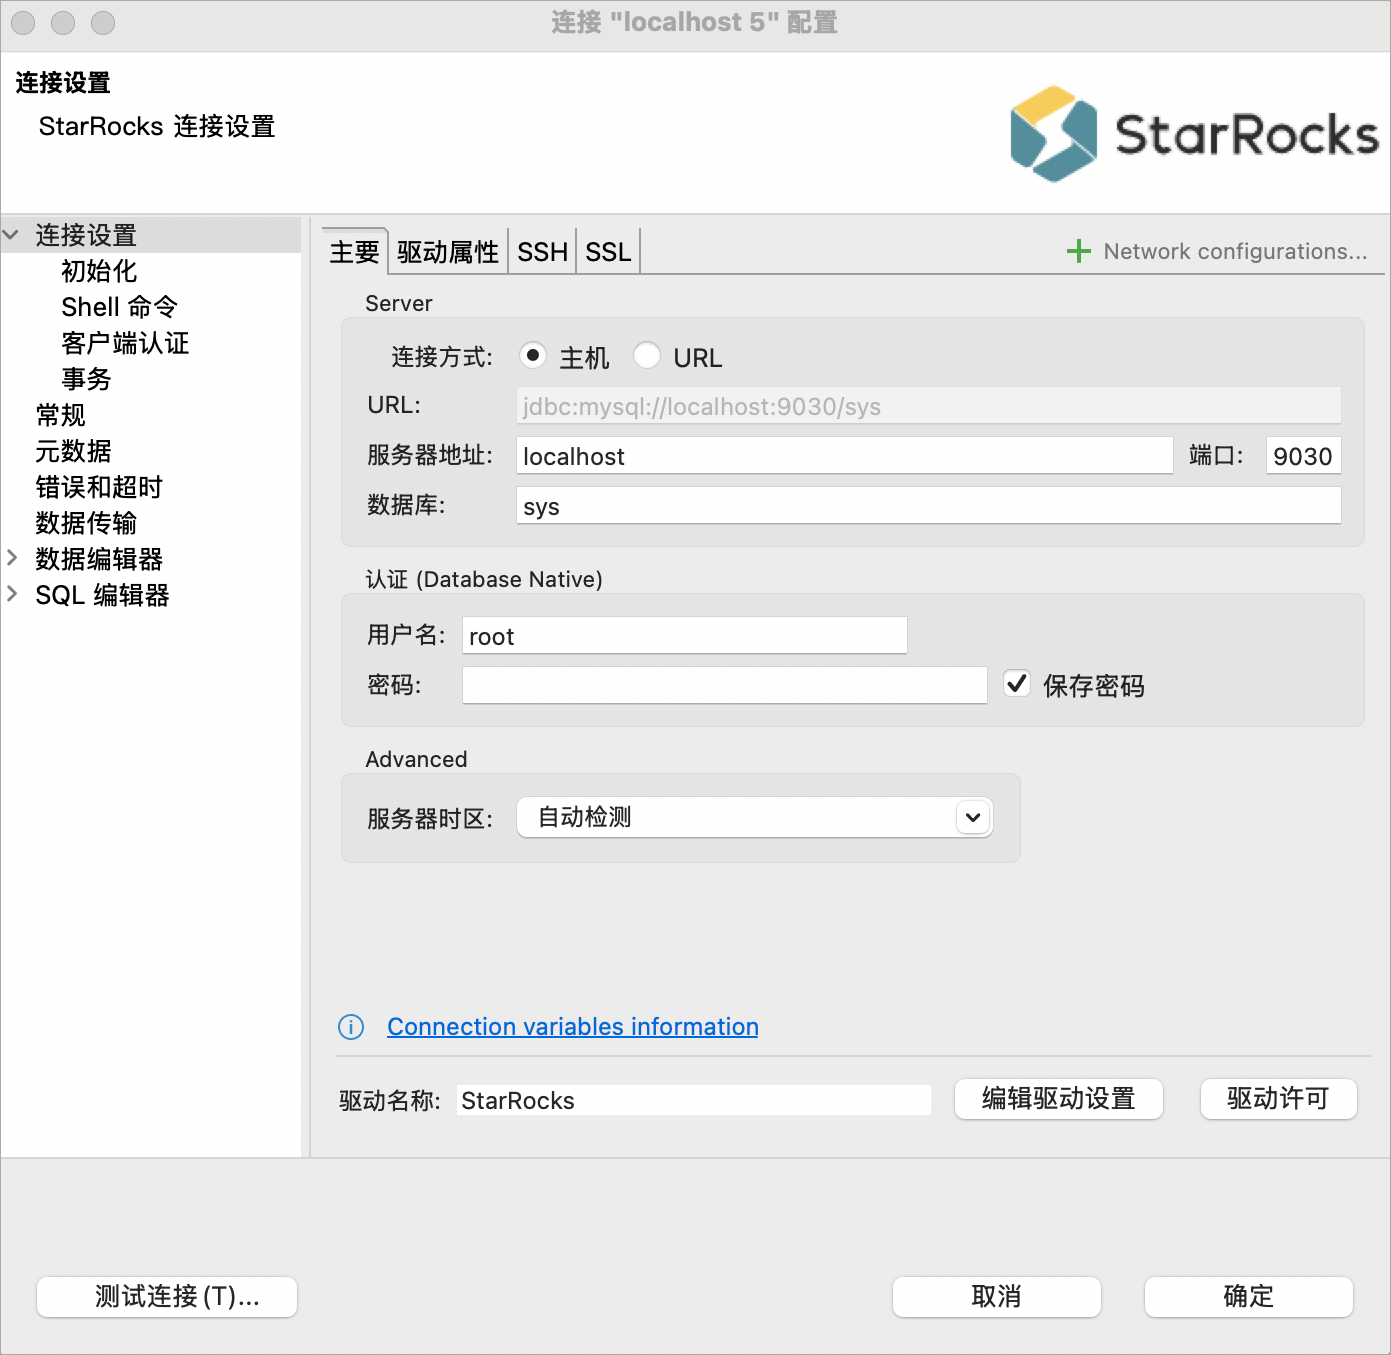
创建示例数据库和表结构。
-- 设置密码 SET PASSWORD = PASSWORD('123456'); -- 创建数据库 CREATE DATABASE test1; CREATE DATABASE test2; -- 创建 test1.orders1 表 CREATE TABLE IF NOT EXISTS test1.orders1 ( order_id INT DEFAULT '1' COMMENT 'order id', order_date DATETIME, customer_name VARCHAR(225) DEFAULT 'default', price DOUBLE, product_id INT, order_status BOOLEAN ) DISTRIBUTED BY HASH(order_id) PROPERTIES ( "replication_num" = "1" ); -- 创建 test1.orders2 表 CREATE TABLE IF NOT EXISTS test1.orders2 ( order_id INT COMMENT 'order id', order_date DATETIME, customer_name VARCHAR(1048576), price DOUBLE, product_id INT, order_status INT DEFAULT '0' ) PRIMARY KEY (order_id) DISTRIBUTED BY HASH(order_id) PROPERTIES ( "replication_num" = "1" ); -- 创建 test1.orders3 表 CREATE TABLE IF NOT EXISTS test1.orders3 ( order_id INT COMMENT 'order id', order_date DATETIME, customer_name VARCHAR(1048576), price DOUBLE, product_id INT, order_status INT DEFAULT '0' ) PRIMARY KEY (order_id) DISTRIBUTED BY HASH(order_id) PROPERTIES ( "replication_num" = "1" ); -- 创建 test2.orders3 表 CREATE TABLE IF NOT EXISTS test2.orders3 ( k1 DATE, k2 INT, k3 SMALLINT, v1 VARCHAR(2048), V0 DATETIME DEFAULT CURRENT_TIMESTAMP, v2 DATETIME DEFAULT "2014-02-04 15:36:00" ) ENGINE = OLAP DUPLICATE KEY(k1, k2, k3) PARTITION BY RANGE (k1) ( PARTITION p1 VALUES LESS THAN ("2014-01-01"), PARTITION p2 VALUES LESS THAN ("2014-06-01"), PARTITION p3 VALUES LESS THAN ("2014-12-01") ) DISTRIBUTED BY HASH(k2) PROPERTIES( "replication_num" = "1", "storage_medium" = "SSD", "storage_cooldown_time" = "2025-06-04 00:00:00" ); -- 创建 test2.orders4 表 CREATE TABLE IF NOT EXISTS test2.orders4 ( id BIGINT COMMENT 'Bigint column', flag TINYINT(1) COMMENT 'Boolean type example', char_col CHAR(10) NOT NULL COMMENT 'Char type example', date_col DATE NOT NULL COMMENT 'Date type example', datetime_col DATETIME COMMENT 'Datetime type example', decimal_col DECIMAL(18, 4) COMMENT 'Decimal type example', double_col DOUBLE COMMENT 'Double type example', float_col FLOAT COMMENT 'Float type example', int_col INT NOT NULL COMMENT 'Int type example', smallint_col SMALLINT COMMENT 'Smallint type example', string_col STRING COMMENT 'String type example, variable-length string', tinyint_col TINYINT COMMENT 'Tinyint type example', varchar_col VARCHAR(255) COMMENT 'Varchar type example, variable-length string', json_col JSON COMMENT 'Json type example, stores JSON formatted data' ) ENGINE=OLAP DUPLICATE KEY(`id`) PARTITION BY (date_col, char_col) DISTRIBUTED BY HASH(`id`) PROPERTIES ( "replication_num" = "1" );插入测试数据。
-- 插入 test1.orders1 数据 INSERT INTO test1.orders1 (order_id, order_date, customer_name, price, product_id, order_status) VALUES (1, '2024-12-05 10:28:07', 'xx', 2.3, 1, 1); -- 插入 test1.orders2 数据 INSERT INTO test1.orders2 (order_id, order_date, customer_name, price, product_id, order_status) VALUES (111, '2024-12-05 10:02:31', 'orders2', 2.3, 1, 1); -- 插入 test1.orders3 数据 INSERT INTO test1.orders3 (order_id, order_date, customer_name, price, product_id, order_status) VALUES (10, '2024-12-05 10:02:31', 'orders3', 2.3, 1, 1), (11, '2024-12-01 10:03:31', 'orders3-2-route', 2.3, 1, 1), (12, '2024-12-02 10:02:35', 'orders3', 2.3, 1, 1); -- 插入 test2.orders4 数据 INSERT INTO test2.orders4 (id, flag, char_col, date_col, datetime_col, decimal_col, double_col, float_col, int_col, smallint_col, string_col, tinyint_col, varchar_col, json_col) VALUES (1, TRUE, 'A123456789', '2023-01-01', '2023-01-01 10:10:10', 1234.5678, 1.23456789, 1.2345, 123, 12, 'example string 1', 1, 'example varchar 1', '{"key1": "value1"}'), (2, FALSE, 'B987654321', '2023-02-01', '2023-02-02 11:11:11', 9876.5432, 9.87654321, 9.8765, 456, 34, 'example string 2', 2, 'example varchar 2', '{"key2": "value2"}'), (3, TRUE, 'C102938475', '2023-03-01', '2023-03-03 12:12:12', 5678.1234, 5.67812345, 5.6789, 789, 56, 'example string 3', 3, 'example varchar 3', '{"key3": "value3"}'), (4, FALSE, 'D564738291', '2023-04-01', '2023-04-04 13:13:13', 4321.8765, 4.32187654, 4.3211, 101, 78, 'example string 4', 4, 'example varchar 4', '{"key4": "value4"}'), (5, TRUE, 'E019283746', '2023-05-01', '2023-05-05 14:14:14', 8765.4321, 8.76543210, 8.7654, 202, 90, 'example string 5', 5, 'example varchar 5', '{"key5": "value5"}');
配置 Flink-OMT 示例任务
创建数据同步任务配置文件。以下示例展示了如何配置 StarRocks 到 OceanBase 的整库同步任务,包含数据源连接、目标数据库设置和同步参数配置:
标准同步模式配置:
################################################################################ # Description: Sync StarRocks all tables to OceanBase ################################################################################ source: type: StarRocks jdbc-url: jdbc:mysql://localhost:9030/sys username: root password: 123456 scan-url: localhost:8030 scan.max-retries: 1 tables: test[1-2].orders[0-9] oceanbase: url: jdbc:mysql://localhost:2881/test username: root@test password: 123456 schema-name: test pipeline: name: Sync StarRocks Database to OceanBase parallelism: 2旁路导入模式配置:
对于大数据量场景,Flink-OMT 支持旁路导入的方式写入 OceanBase 数据库,该方式能够绕过 SQL 解析层,直接在底层数据文件中分配空间并写入数据,显著提升导入性能。配置示例如下:
################################################################################ # Description: Sync StarRocks all tables to OceanBase ################################################################################ source: type: StarRocks jdbc-url: jdbc:mysql://localhost:9030/sys username: root password: 123456 scan-url: localhost:8030 scan.max-retries: 1 tables: test[1-2].orders[0-9] oceanbase: type: direct-load url: jdbc:mysql://localhost:2881/test username: root@test host: localhost port: 2882 password: 123456 schema-name: test pipeline: name: Sync StarRocks Database to OceanBase parallelism: 2
提交和执行任务
使用以下命令提交任务到 Flink Standalone 集群:
<FLINK_HOME>bin/flink run \
-D execution.checkpointing.interval=10s\
-D parallelism.default=1\
-c com.oceanbase.omt.cli.CommandLineCliFront\
lib/flink-omt-1.0-SNAPSHOT_flink-1.19.jar \
-config StarRocks-to-OceanBase.yaml
如需以 detached 模式运行任务,可以使用以下命令:
<FLINK_HOME>bin/flink run \
-D execution.checkpointing.interval=10s\
-D parallelism.default=18\
-d \
-c com.oceanbase.omt.cli.CommandLineCliFront\
lib/flink-omt-1.0-SNAPSHOT_flink-1.19.jar \
-config StarRocks-to-OceanBase.yaml
提交成功后,会显示类似如下信息:
============= The following tables will be migrate from StarRocks to oceanbase ============
test2.orders4
test2.orders3
test1.orders3
test1.orders1
test1.orders2
Job has been submitted with JobID 957bd429a36e60f4329e7a0412d4a489
Program execution finished
Job with JobID 957bd429a36e60f4329e7a0412d4a489 has finished.
Job Runtime: 3587 ms
验证数据同步结果
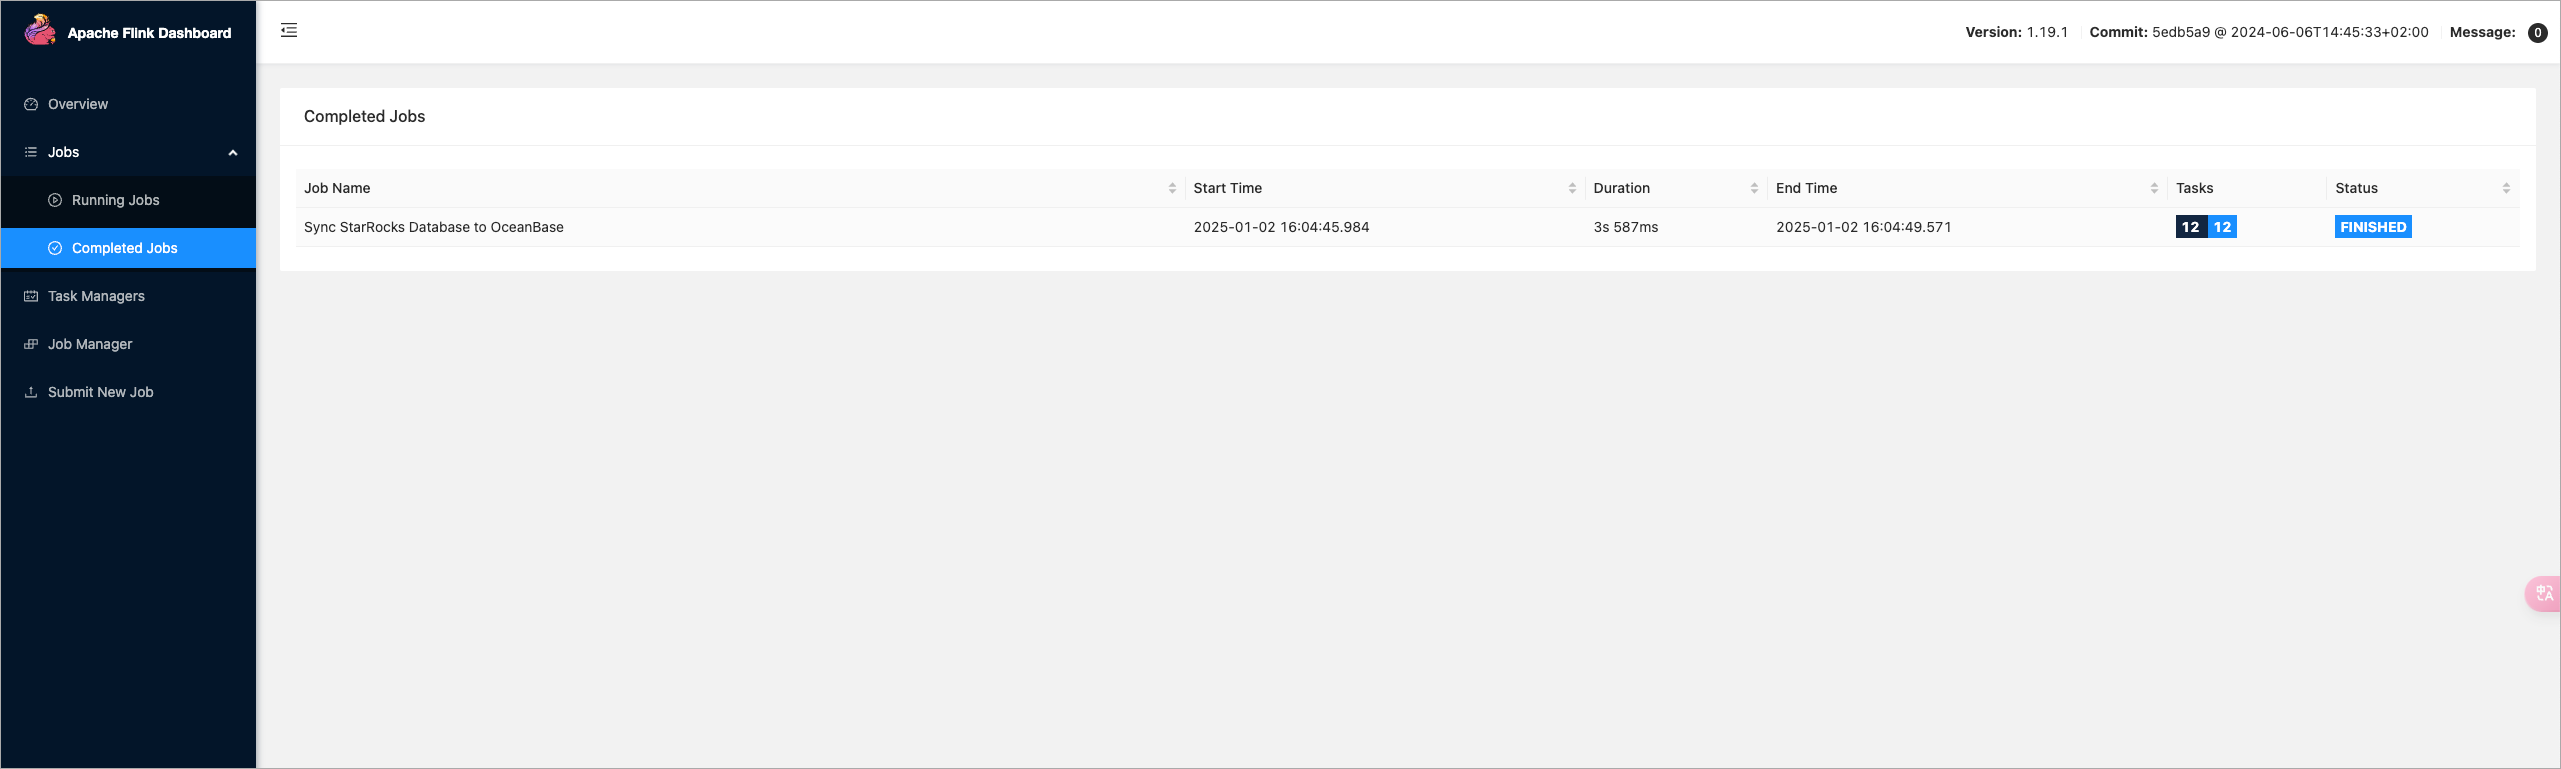
在 Flink 页面中可以看到名为 "Sync StarRocks Database to OceanBase" 的任务正在运行,如下图所示。
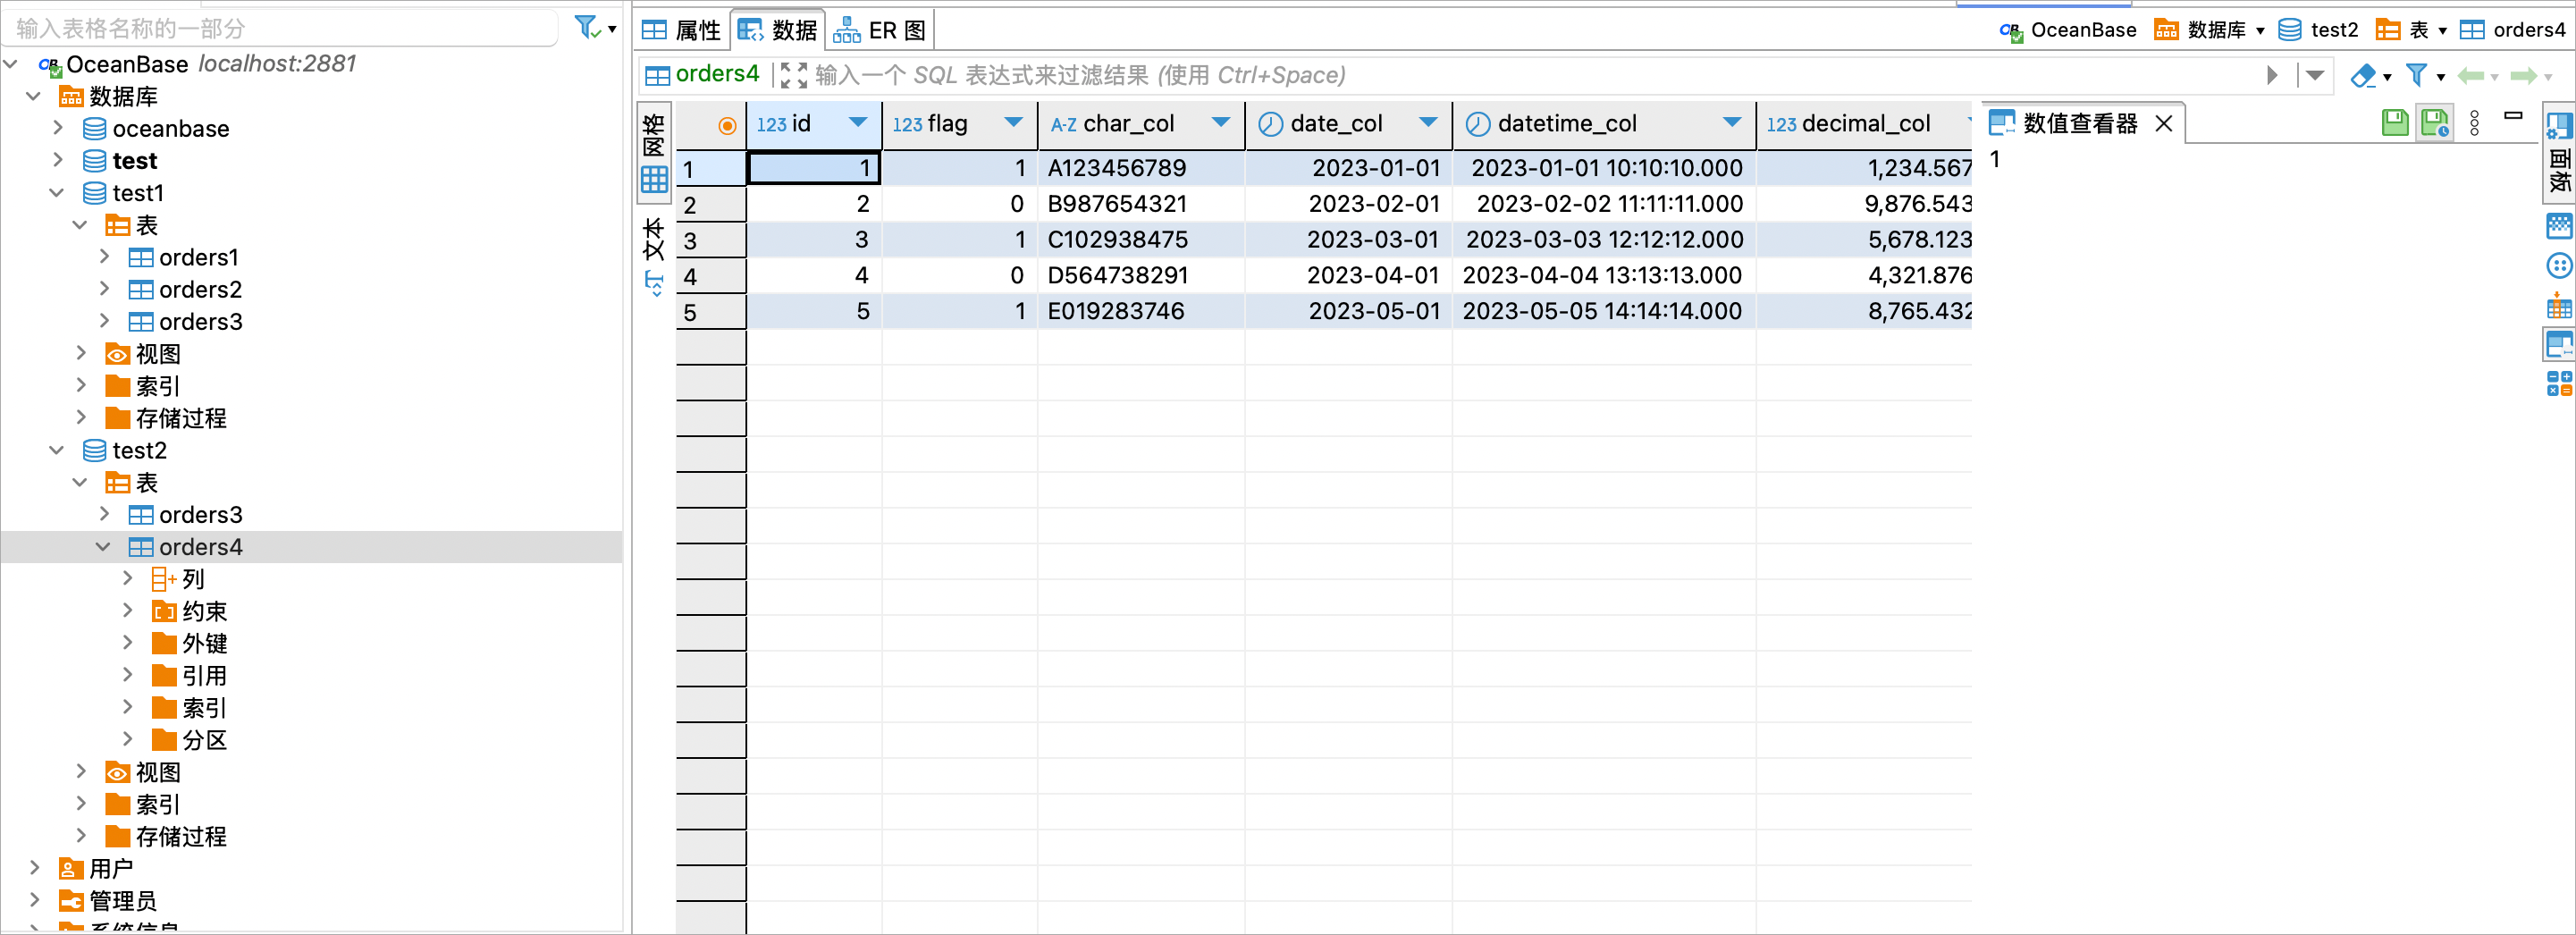
在 DBeaver 中连接 OceanBase 数据库后,可以看到数据表已完成创建,数据能成功写入,如下图所示。
清理示例环境
完成数据同步任务后,建议清理示例环境以释放系统资源。
在
docker-compose.yml文件所在目录下执行以下命令停止所有容器:docker-compose down在 Flink 所在目录(
flink-1.19.1)下执行以下命令停止 Flink 集群:./bin/stop-cluster.sh


