
首批通过分布式安全可靠测评,为关键业务系统打造


OMS 接入 OIDC 协议实现单点登录
更新时间:2026-04-14 15:35:54
分享
OceanBase 迁移服务(OceanBase Migration Service,OMS)适配标准 OAuth2 认证中心,需要支持 OIDC 协议。目前仅支持授权码(authorization-code)模式。本文为您介绍接入 OIDC 协议需要更新的配置,以实现单点登录 SSO 能力。
获取认证中心配置
您需要在 SSO 服务中添加应用,获取对应的应用标识和应用密钥,以及其它 OIDC 需要的配置。
| 参数 | 描述 |
|---|---|
| clientId | 应用标识。 |
| clientSecret | 应用密钥。 |
| scope | 权限标识,使用英文逗号(,)分隔,且必须包含 openid。例如,openid,profile。 |
| ClientAuthenticationMethod | 认证方式,目前支持 client_secret_basic(推荐使用)和 basic。 |
| jwk_set_uri | 用于 JWK 的解码。 |
| authorization_uri | 授权 endpoint。 |
| token_uri | 获取凭证 endpoint。 |
配置回调地址
如果 SSO 系统有登录回调地址的白名单,您需要配置白名单。
登录回调地址配置为:http://{serverDomain}/login/oauth2/code/oms,其中 serverDomain 是您部署 OMS 的域名。
部署 OMS
本文以单节点部署为例,为您介绍如何实现单点登录方式登录 OMS。如果您需要进行单地域多节点或多地域多节点部署,请参见 单地域多节点部署 或 多地域多节点部署 中《部署流程(有配置文件)》模块的内容。
前提条件
确认安装环境符合系统和网络要求,详情请参见 系统和网络要求。
已准备 MetaDB 集群作为 OMS 的元信息库。
已获取 OMS 安装包,通常安装包为以 oms 开头的
tar.gz文件。已加载下载的 OMS 安装包至 Docker 容器的本地镜像仓库。
docker load -i <OMS 安装包>已准备一个 OMS 容器挂载目录,OMS 会在该目录下创建三个映射目录:
/home/admin/logs、/home/ds/store和/home/ds/run,用于存放 OMS 运行时的组件和日志信息。(可选)已准备时序数据库为 OMS 存储性能监控和 DDL/DML 统计数据信息。
操作步骤
登录 OMS 部署服务器。
(可选)部署时序数据库。
如果您需要 OMS 能够收集和展示监控数据,请部署时序数据库。如果无需展示监控数据,请跳过本步骤。操作详情请参见 部署时序数据库。
执行下述命令,从加载的镜像中获取部署脚本
docker_remote_deploy.sh。sudo docker run --name oms-config-tool <OMS_IMAGE> bash && sudo docker cp oms-config-tool:/root/docker_remote_deploy.sh . && sudo docker rm -f oms-config-tool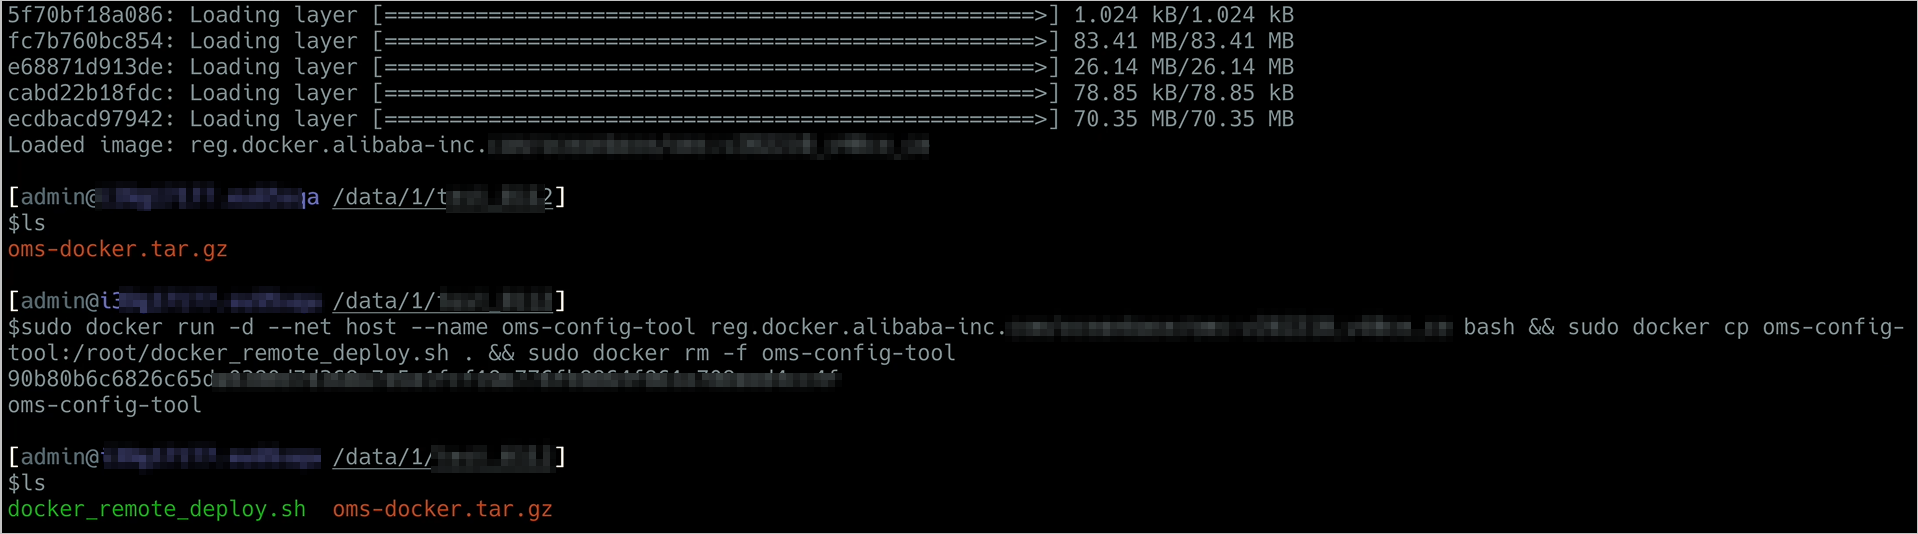
通过部署脚本启动部署工具。
sh docker_remote_deploy.sh -o <OMS 容器挂载目录> -c <已有 config.yaml 配置文件地址> -i <本机 IP 地址> -d <OMS_IMAGE>说明
config.yaml配置文件的设置请参见下文《配置文件的模板和示例》模块。
根据工具提示完成部署,每次输入后,通过回车进入下一步。
请选择部署模式。
此处请选择 单地域单节点 选项。
请选择您所需要进行的任务。
此处请选择 已通过脚本 [-c] 选项传入参考配置文件,基于参考配置文件开始配置。
如果出现 元数据库中对应数据库名已存在!这样可以吗? 提示,说明原配置文件的 MetaDB 中已存在您输入的数据库名称。该情况可能是由于重复部署或执行 OMS 升级导致,请您自行确认后,输入 y 继续部署,或输入 n 重新输入配置信息。
如果配置文件检查通过,会为您展示所有的配置信息。如果确认无误,请输入 n。如果需要修改,请输入 y。
如果配置文件未检查通过,请根据提示修改配置信息。
请输入节点 <节点 IP> 上预备部署 OMS 容器的挂载目录:
请输入一个有较大容量的目录作为 OMS 容器的挂载目录。
请确认部署 OMS 的镜像名为 <OMS_IMAGE> 是否可以。
如果确认无误,请输入 y。如果需要修改,请输入 n。
请确认是否需要在 OMS 容器中挂载 HTTPS 证书。
如果需要,请输入 y,并根据提示输入 https_key、https_crt 目录。如果不需要,请输入 n。
开始执行部署。
部署完成后,如果您需要修改配置,请进行以下操作:
登录至运行的 OMS 容器。
根据业务需求,修改
/home/admin/conf/config.yaml文件。执行命令
python -m omsflow.scripts.units.oms_init_manager --init-config-file。执行命令
supervisorctl restart oms_console oms_drc_supervisor。
配置文件的模板和示例
配置文件模板
注意
模板中的必填参数需要替换为您部署的目标环境的实际值。本文已将可选参数进行注释,您可以根据实际情况选择性修改。
config.yaml文件中的 Key: Value,冒号后面必须加一个空格。
# OMS 元数据库信息
oms_meta_host: ${oms_meta_host}
oms_meta_port: ${oms_meta_port}
oms_meta_user: ${oms_meta_user}
oms_meta_password: ${oms_meta_password}

# 用户可以自定义以下三个数据库的名称,OMS 部署时会在元信息库中创建出这三个数据库
drc_rm_db: ${drc_rm_db}
drc_cm_db: ${drc_cm_db}
drc_cm_heartbeat_db: ${drc_cm_heartbeat_db}

# OMS 集群配置
# 单节点部署时,通常配置为当前 OMS 机器 IP(建议使用内网 IP)
cm_url: ${cm_url}
cm_location: ${cm_location}
# 单节点部署时,无需设置 cm_region
# cm_region: ${cm_region}
# 单节点部署时,无需设置 cm_region_cn
# cm_region_cn: ${cm_region_cn}
cm_is_default: true
cm_nodes:
 - ${cm_nodes}

# 时序数据库配置
# 默认值为 false。如果您需要开启指标汇报功能,请设置为 true
# tsdb_enabled: false
# 当 tsdb_enabled 为 true 时,请取消下述参数的注释并根据实际情况填写
# tsdb_service: 'INFLUXDB'
# tsdb_url: '${tsdb_url}'
# tsdb_username: ${tsdb_user}
# tsdb_password: ${tsdb_password}

# 下述参数为使用单点登录 SSO 的方式登录 OMS 需要新增的参数
oms_iam_auth: OAUTH2
oms_oauth2_user_account_name_field: nickname
oms_oauth2_sso_login_url: http://oms.example/org:8090/omsp/oauth2/authorization/oms?oms_back_url=http://oms.example.org:8090
spring_security_oauth2_client_registration_oms_client_id: xxx
spring_security_oauth2_client_registration_oms_client_secret: xxx
spring_security_oauth2_client_registration_oms_redirect_uri: http://oms.example.org:8090/omsp/login/oauth2/code/{registrationId}
spring_security_oauth2_client_registration_oms_authorization_grant_type: authorization_code
spring_security_oauth2_client_registration_oms_scope: openid,profile
spring_security_oauth2_client_registration_oms_clientAuthenticationMethod: client_secret_basic
spring_security_oauth2_client_registration_oms_provider: oms
spring_security_oauth2_client_provider_jwk_set_uri: https:xxx.com
spring_security_oauth2_client_provider_authorization_uri: https://xxxx/api/auth
spring_security_oauth2_client_provider_token_uri: https://xxx/api/token
| 参数 | 描述 | 是否必选 |
|---|---|---|
| oms_meta_host | 元信息库的 IP 地址,目前仅支持 OceanBase 数据库 MySQL 租户,并且需要是 V2.0 及之后版本。 | 必选 |
| oms_meta_port | 元信息库的端口号。 | 必选 |
| oms_meta_user | 元信息库的用户名称。 | 必选 |
| oms_meta_password | 元信息库的用户密码。 | 必选 |
| drc_rm_db | 管理控制台的数据库名称。 | 必选 |
| drc_cm_db | 集群管理服务的元数据库名称。 | 必选 |
| drc_cm_heartbeat_db | 集群管理服务的心跳库的名称。 | 必选 |
| cm_url | OMS 集群管理服务的地址。例如,http://xxx.xxx.xxx.xxx:8088。 说明: 单节点部署时,通常配置为当前 OMS 机器 IP。不建议您使用 http://127.0.0.1:8088。 OMS 控制台的访问地址为: 部署 OMS 的宿主机的 IP 地址:8089。例如,http(https)://xxx.xxx.xxx.xxx:8089。 8088 是负责调度的程序端口,8089 是网页地址的端口,此处必须使用 8088 端口。 |
必选 |
| cm_location | 地域码,取值范围为 [0,127]。每个地域一个数字,用户自行选择。 | 必选 |
| cm_region | 地域,例如 cn-jiangsu。 注意: 如果是和阿里云 MSHA 产品在容灾双活场景下使用,请使用阿里云的 Region 信息作为 cm_region。 |
可选 |
| cm_region_cn | 地域的中文标识。例如,江苏。 | 可选 |
| cm_nodes | OMS 集群管理服务的机器 IP 列表。 | 必选 |
| cm_is_default | 标识是否默认 OMS 集群管理服务。 | 可选,默认值为 true |
| tsdb_enabled | 表示是否开启指标汇报的功能(监控能力),包括 true 或 false。 |
可选,默认值为 false |
| tsdb_service | 表示时序数据库的类型,包括 INFLUXDB 和 CERESDB。 |
可选,默认值为 CERESDB |
| tsdb_url | 部署 InfluxDB 的机器地址。当 tsdb_enabled 为 true 时,请根据实际环境修改该参数。 |
可选 |
| tsdb_username | 时序数据库的用户名。当 tsdb_enabled 为 true 时,请根据实际环境修改该参数。 部署时序数据库后,需要您手动创建时序数据库用户,并填写用户名和密码。 |
可选 |
| tsdb_password | 时序数据库的密码。当 tsdb_enabled 为 true 时,请根据实际环境修改该参数。 |
可选 |
| oms_iam_auth | 登录方式,支持 OAUTH2 和 LOCAL。OAUTH2 可以同时兼容密码模式。 | 必选 |
| oms_oauth2_user_account_name_field | 从 IdToken 中获取用户名称的字段。例如,nick 或者 nickname。 | 必选 |
| oms_oauth2_sso_login_url | http://{serverDomain}/omsp/oauth2/authorization/oms?oms_back_url={serverDomain}。其中 {serverDomain} 为用户域名,oms_back_url 为登录成功后的前端页面。 |
必选 |
| spring_security_oauth2_client_registration_oms_client_id | 应用标识 clientId。 | 必选 |
| spring_security_oauth2_client_registration_oms_client_secret | 应用密钥 clientSecret。 | 必选 |
| spring_security_oauth2_client_registration_oms_redirect_uri | 即《配置回调地址》步骤中配置的 redirectUrl,格式为 http://{serverDomain}/login/oauth2/code/{registrationId}。其中 {serverDomain} 为用户域名,{registrationId} 无需填充。 |
必选 |
| spring_security_oauth2_client_registration_oms_authorization_grant_type | 目前仅支持 authorization_code 模式。 | 必选 |
| spring_security_oauth2_client_registration_oms_scope | 权限标识,使用英文逗号(,)分隔,且必须包含 openid。 |
必选 |
| spring_security_oauth2_client_registration_oms_provider | 您可以自定义。例如,oidc。 | 必选 |
| spring_security_oauth2_client_provider_jwk_set_uri | 用于 JWK 的解码。 | 必选 |
| spring_security_oauth2_client_provider_authorization_uri | 授权 endpoint。 |
必选 |
| spring_security_oauth2_client_provider_token_uri | 获取凭证 endpoint。 |
必选 |
配置文件示例
请根据您部署的目标环境替换参数的实际值。
oms_meta_host: xxx.xxx.xxx.xxx
oms_meta_port: 2883
oms_meta_user: oms_meta_user
oms_meta_password: ***********
drc_rm_db: oms_rm
drc_cm_db: oms_cm
drc_cm_heartbeat_db: oms_cm_heartbeat
cm_url: http://xxx.xxx.xxx.xxx:8088
cm_location: 100
cm_region: cn-anhui
cm_region_cn: 安徽
cm_is_default: true
cm_nodes:
  - xxx.xxx.xxx.xxx
tsdb_service: 'INFLUXDB'
tsdb_enabled: true
tsdb_url: 'xxx.xxx.xxx.xxx:8086'
tsdb_username: username
tsdb_password: *************
oms_iam_auth: OAUTH2
oms_oauth2_user_account_name_field: nickname
oms_oauth2_sso_login_url: http://oms.example/org:8090/omsp/oauth2/authorization/oms?oms_back_url=http://oms.example.org:8090
spring_security_oauth2_client_registration_oms_client_id: xxx
spring_security_oauth2_client_registration_oms_client_secret: xxx
spring_security_oauth2_client_registration_oms_redirect_uri: http://oms.example.org:8090/omsp/login/oauth2/code/{registrationId}
spring_security_oauth2_client_registration_oms_authorization_grant_type: authorization_code
spring_security_oauth2_client_registration_oms_scope: openid,profile
spring_security_oauth2_client_registration_oms_clientAuthenticationMethod: client_secret_basic
spring_security_oauth2_client_registration_oms_provider: oms
spring_security_oauth2_client_provider_jwk_set_uri: https:xxx.com
spring_security_oauth2_client_provider_authorization_uri: https://xxxx/api/auth
spring_security_oauth2_client_provider_token_uri: https://xxx/api/token


