
基于湖库一体架构,统一管理结构化、半结构化与非结构化等多模态数据,一个系统承载事务处理、实时分析与 AI 工作负载。


oblogproxy 参数说明
更新时间:2026-04-14 15:36:02
分享
OceanBase 迁移服务(OceanBase Migration Service,OMS)支持 oblogproxy IP 和端口输入,解决网络隔离场景下的增量数据同步问题。
前提条件
已安装 V2.1.0 及之后版本的 oblogproxy。
注意事项
您需要为 OceanBase 数据源配置 高级选项 中的 用户名(drc_user) 和 密码(password)。
变更 oblogproxy 有以下两种场景,需要进行不同的操作。
完全弃用原有的 oblogproxy,使用新的 IP 地址和端口。该场景下,您需要重新创建所有的相关任务。
存在多个 oblogproxy。该场景下,不同的任务需要使用不同的 oblogproxy。您可以通过修改系统参数
oms.oceanbase.logproxy.pool的方式变更 oblogproxy IP 和端口。
参数说明
OMS V4.0.2 及之后版本支持通过系统参数 oms.oceanbase.logproxy.pool 控制 OMS OceanBase logProxy 的配置,OMS 自动识别该参数。您配置 OceanBase 数据源 高级选项 中的 用户名 和 密码 后,OMS 会自动使用 oblogproxy Store。
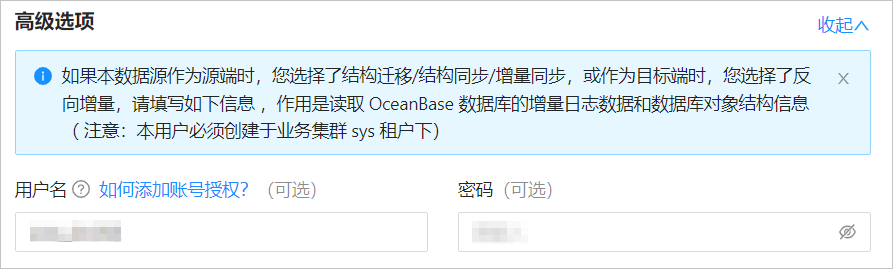
系统参数 oms.oceanbase.logproxy.pool 的配置值类型为 JSON STRING,配置值示例如下。
说明
请根据实际情况填写 IP 和端口。
{
    "__default__": "xxx.xxx.xxx.1:3983",// 全局默认配置
    "cluster_a": {
    "__default__": "xxx.xxx.xxx.2:3983",// 集群默认配置
    "tenant_a1": "xxx.xxx.xxx.3:3983",//租户配置
    "tenant_a2": "xxx.xxx.xxx.4:3983"//租户配置
    },
    "cluster_b": {
    "__default__": "xxx.xxx.xxx.4:3983"
    },
    "cluster_c": {
    "tenant_c1": "xxx.xxx.xxx.5:3983"
    }
}
OMS 支持在全局(
__default__)、集群(cluster)和租户(tenant)三个粒度配置 oblogproxy。对于一个给定的 OceanBase 集群,使用其 {集群 ID} 和 {租户 ID} 在配置值中检索:
如果 {集群 ID} 和 {租户 ID} 均命中,直接返回。
以
cluster_a集群为例,如果是tenant_a1租户,会使用tenant_a1租户对应的配置xxx.xxx.xxx.3:3983。cluster_a集群下的其它租户,则使用cluster_a集群的默认配置xxx.xxx.xxx.2:3983。如果仅 {集群 ID} 命中、{租户 ID} 未命中,且 {集群 ID} 的 JSON 下存在
__default__属性,使用该 oblogproxy。以
cluster_b集群为例,该集群下的所有租户都会使用xxx.xxx.xxx.4:3983。如果 {集群 ID} 未命中,但是 JSON 根节点存在
__default__属性,使用该 oblogproxy。以
cluster_c集群为例,该集群下的tenant_c1租户会使用xxx.xxx.xxx.5:3983,其它租户会使用全局默认配置xxx.xxx.xxx.1:3983。如果不符合上述情况,则认为该 OceanBase 集群未定义 oblogproxy,不支持从 oblogproxy 消费增量。
{集群 ID} 和 {租户 ID} 均未命中,则使用全局默认配置。以上述配置值为例,除
cluster_a、cluster_b和cluster_c集群外的集群和租户,均使用全局默认配置xxx.xxx.xxx.1:3983。
配置步骤
未配置系统参数 oms.oceanbase.logproxy.pool 前,您在 数据源管理 页面查看目标 OceanBase 数据源的 OBLogProxy 和 Port 为空。
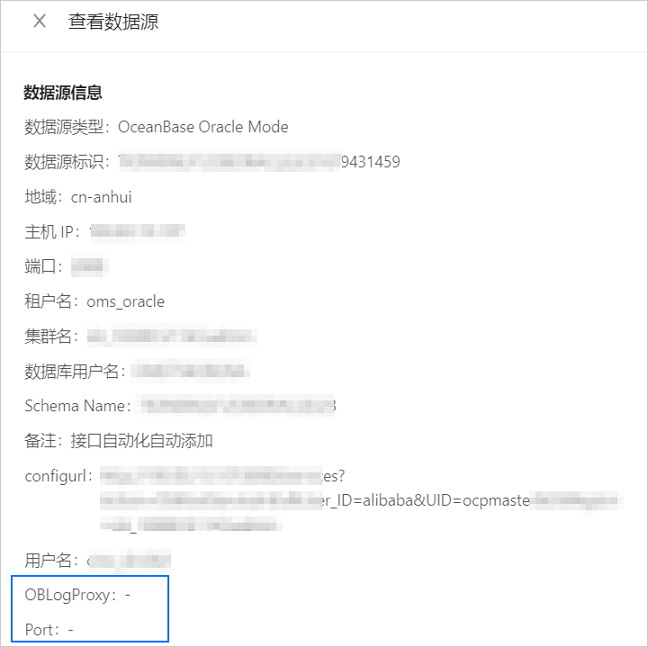
您可以通过以下操作,更新 OceanBase 数据源中的 OBLogProxy 和 Port。
登录 OMS 控制台。
在左侧导航栏,单击 系统管理 > 系统参数。
单击目标参数
oms.oceanbase.logproxy.pool的 取值 列下的编辑图标。在 修改取值 对话框中,配置 取值,您也可以 恢复默认值。
单击 确定。
配置完成后,再返回查看 OceanBase 数据源的信息,即可看到配置的 OBLogProxy IP 和 Port 信息。


